Video Tutorial
Review Gating Guidelines
Before configuring your settings, please refer to the review gating guidelines
Click Here
Settings
Location: Review Portal > Settings
App Review Page
This first sections configures your Unsatisfactory Rating Threshold.
So for this configuration, anything with 3 stars or less will prompt the leave a review section.
💡 What is a Rating Threshold?
A determined star rating where you would want the advocate to submit a personal message to the company via email, before having the option to proceed to your review websites.
🤔 Can Unsatisfactory Reviews still be posted on the Review Websites?
Yes, the advocate still has the option to leave a Review on your websites, but this would be an extra step if they are below the Threshold.
Page Design
Editor for the message sent out when the Advocate selects a star, this is just a simple message like below.
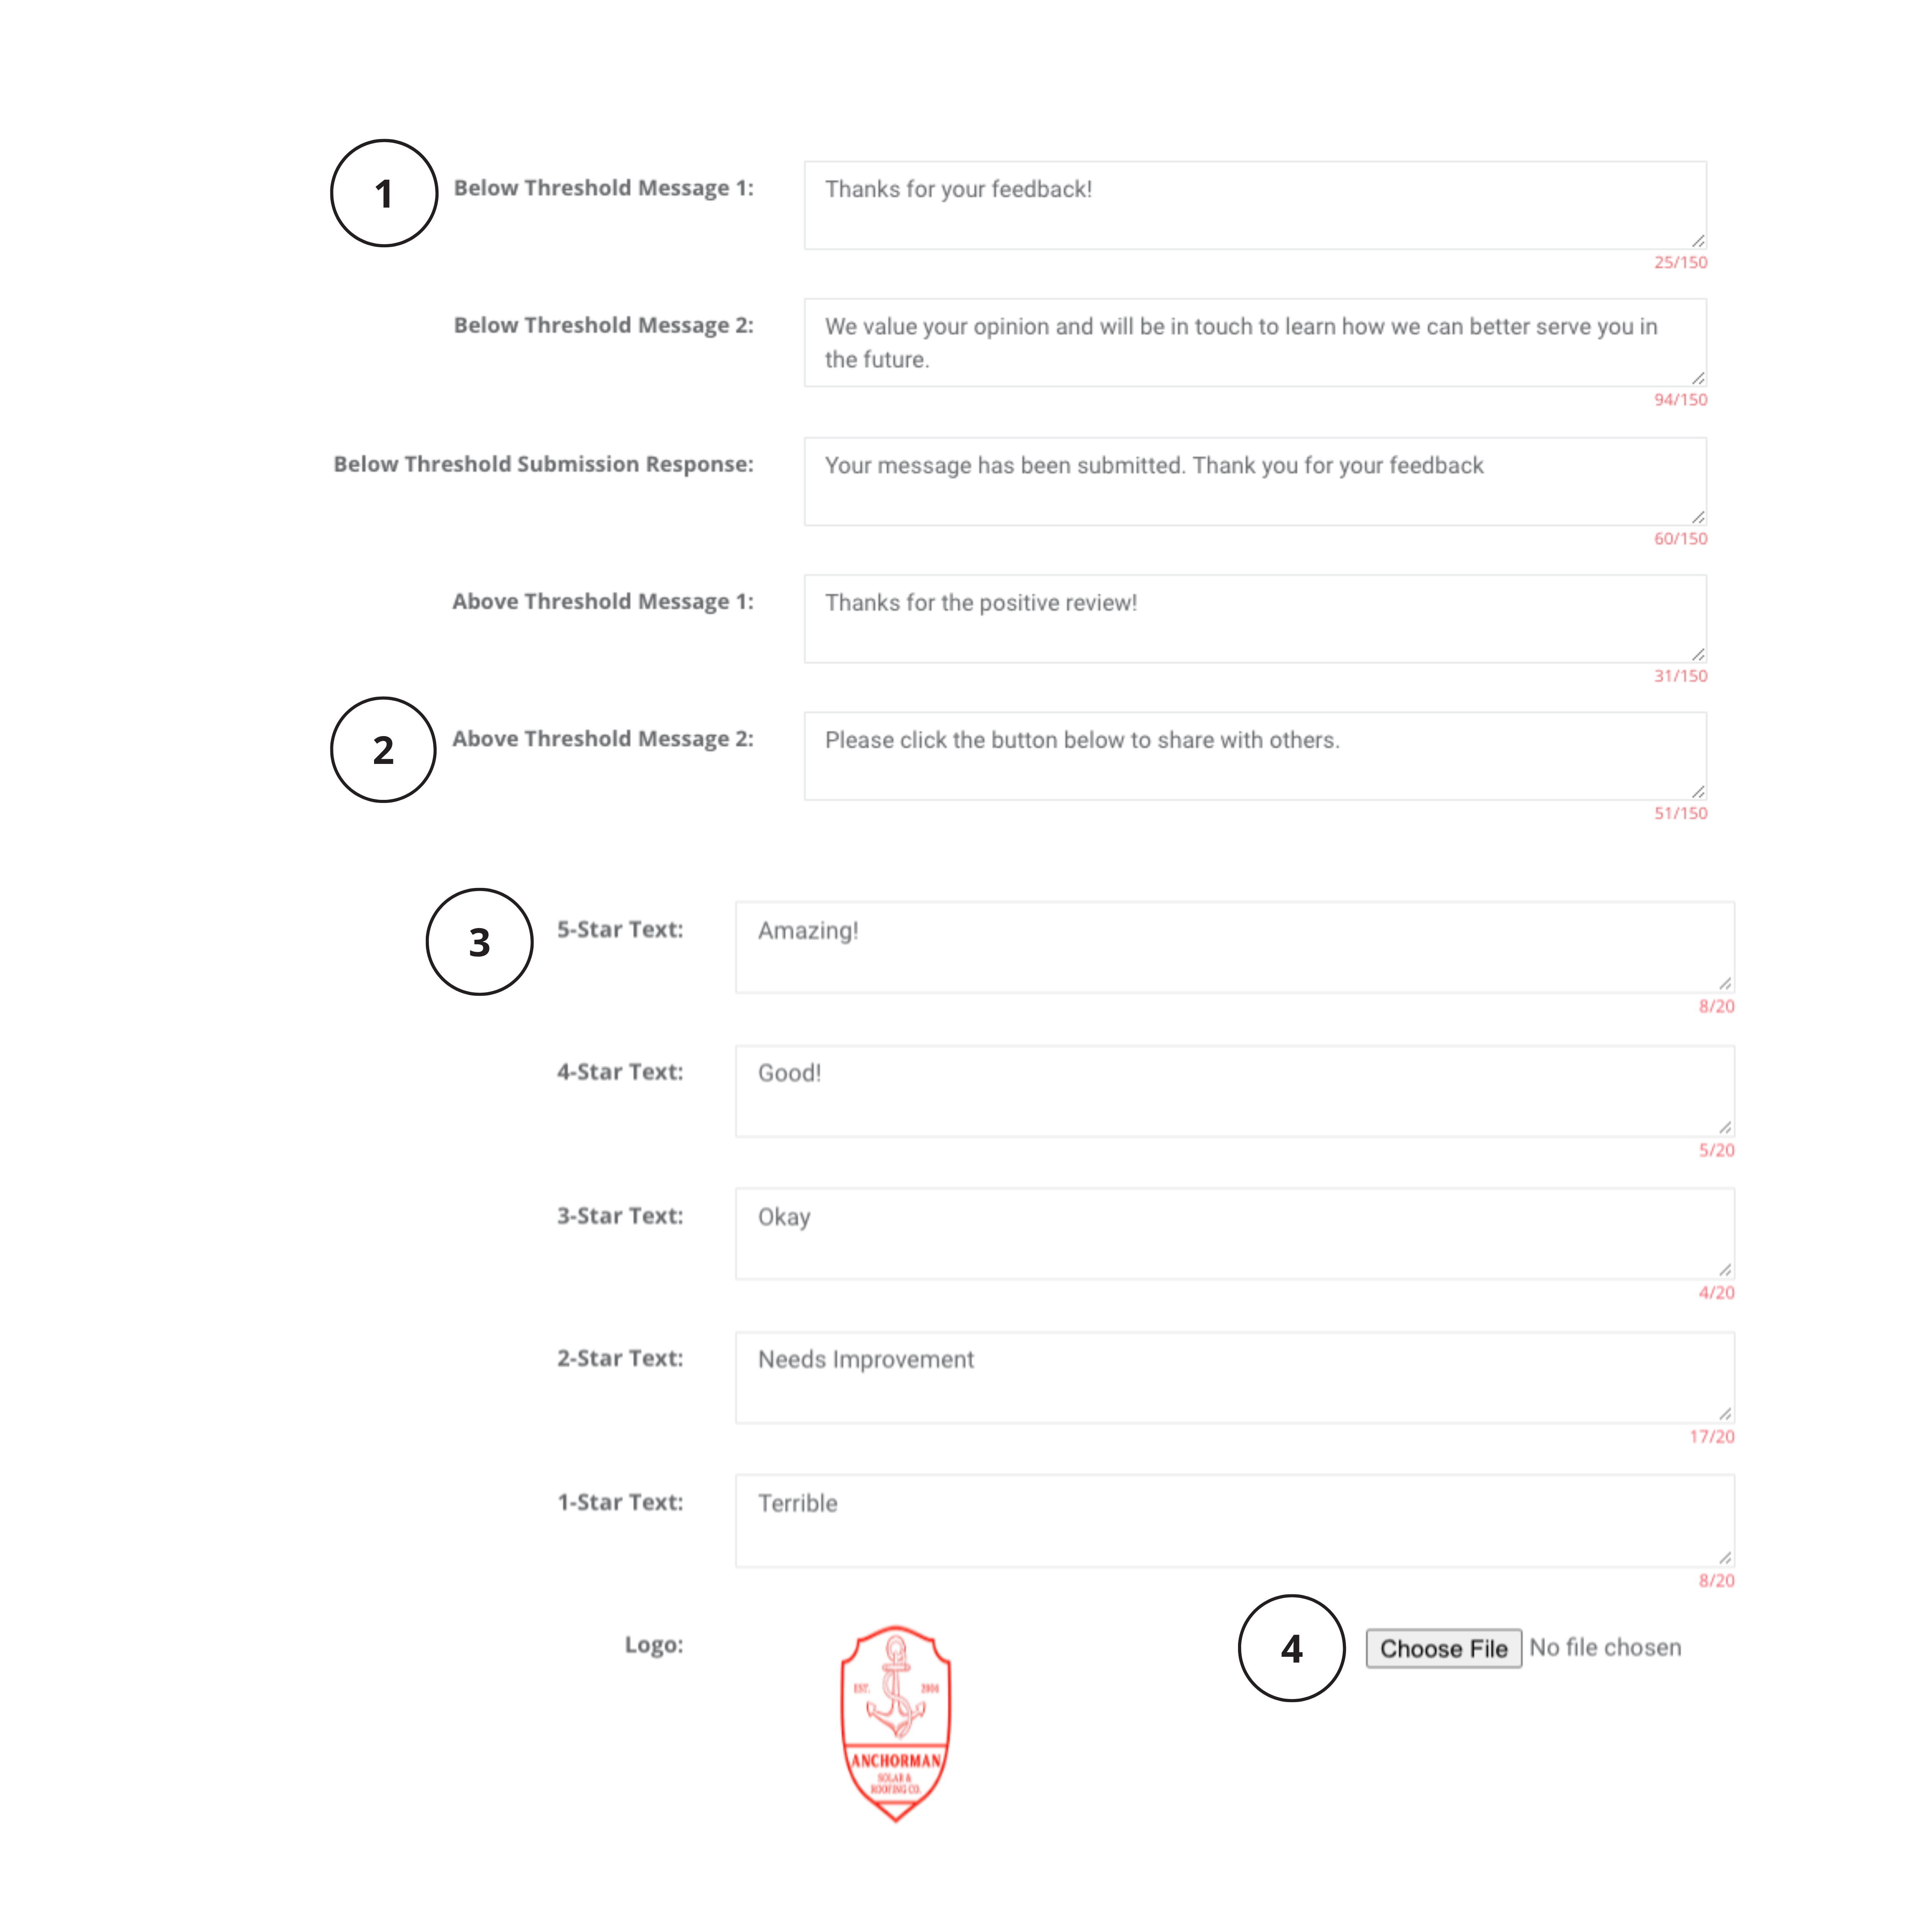
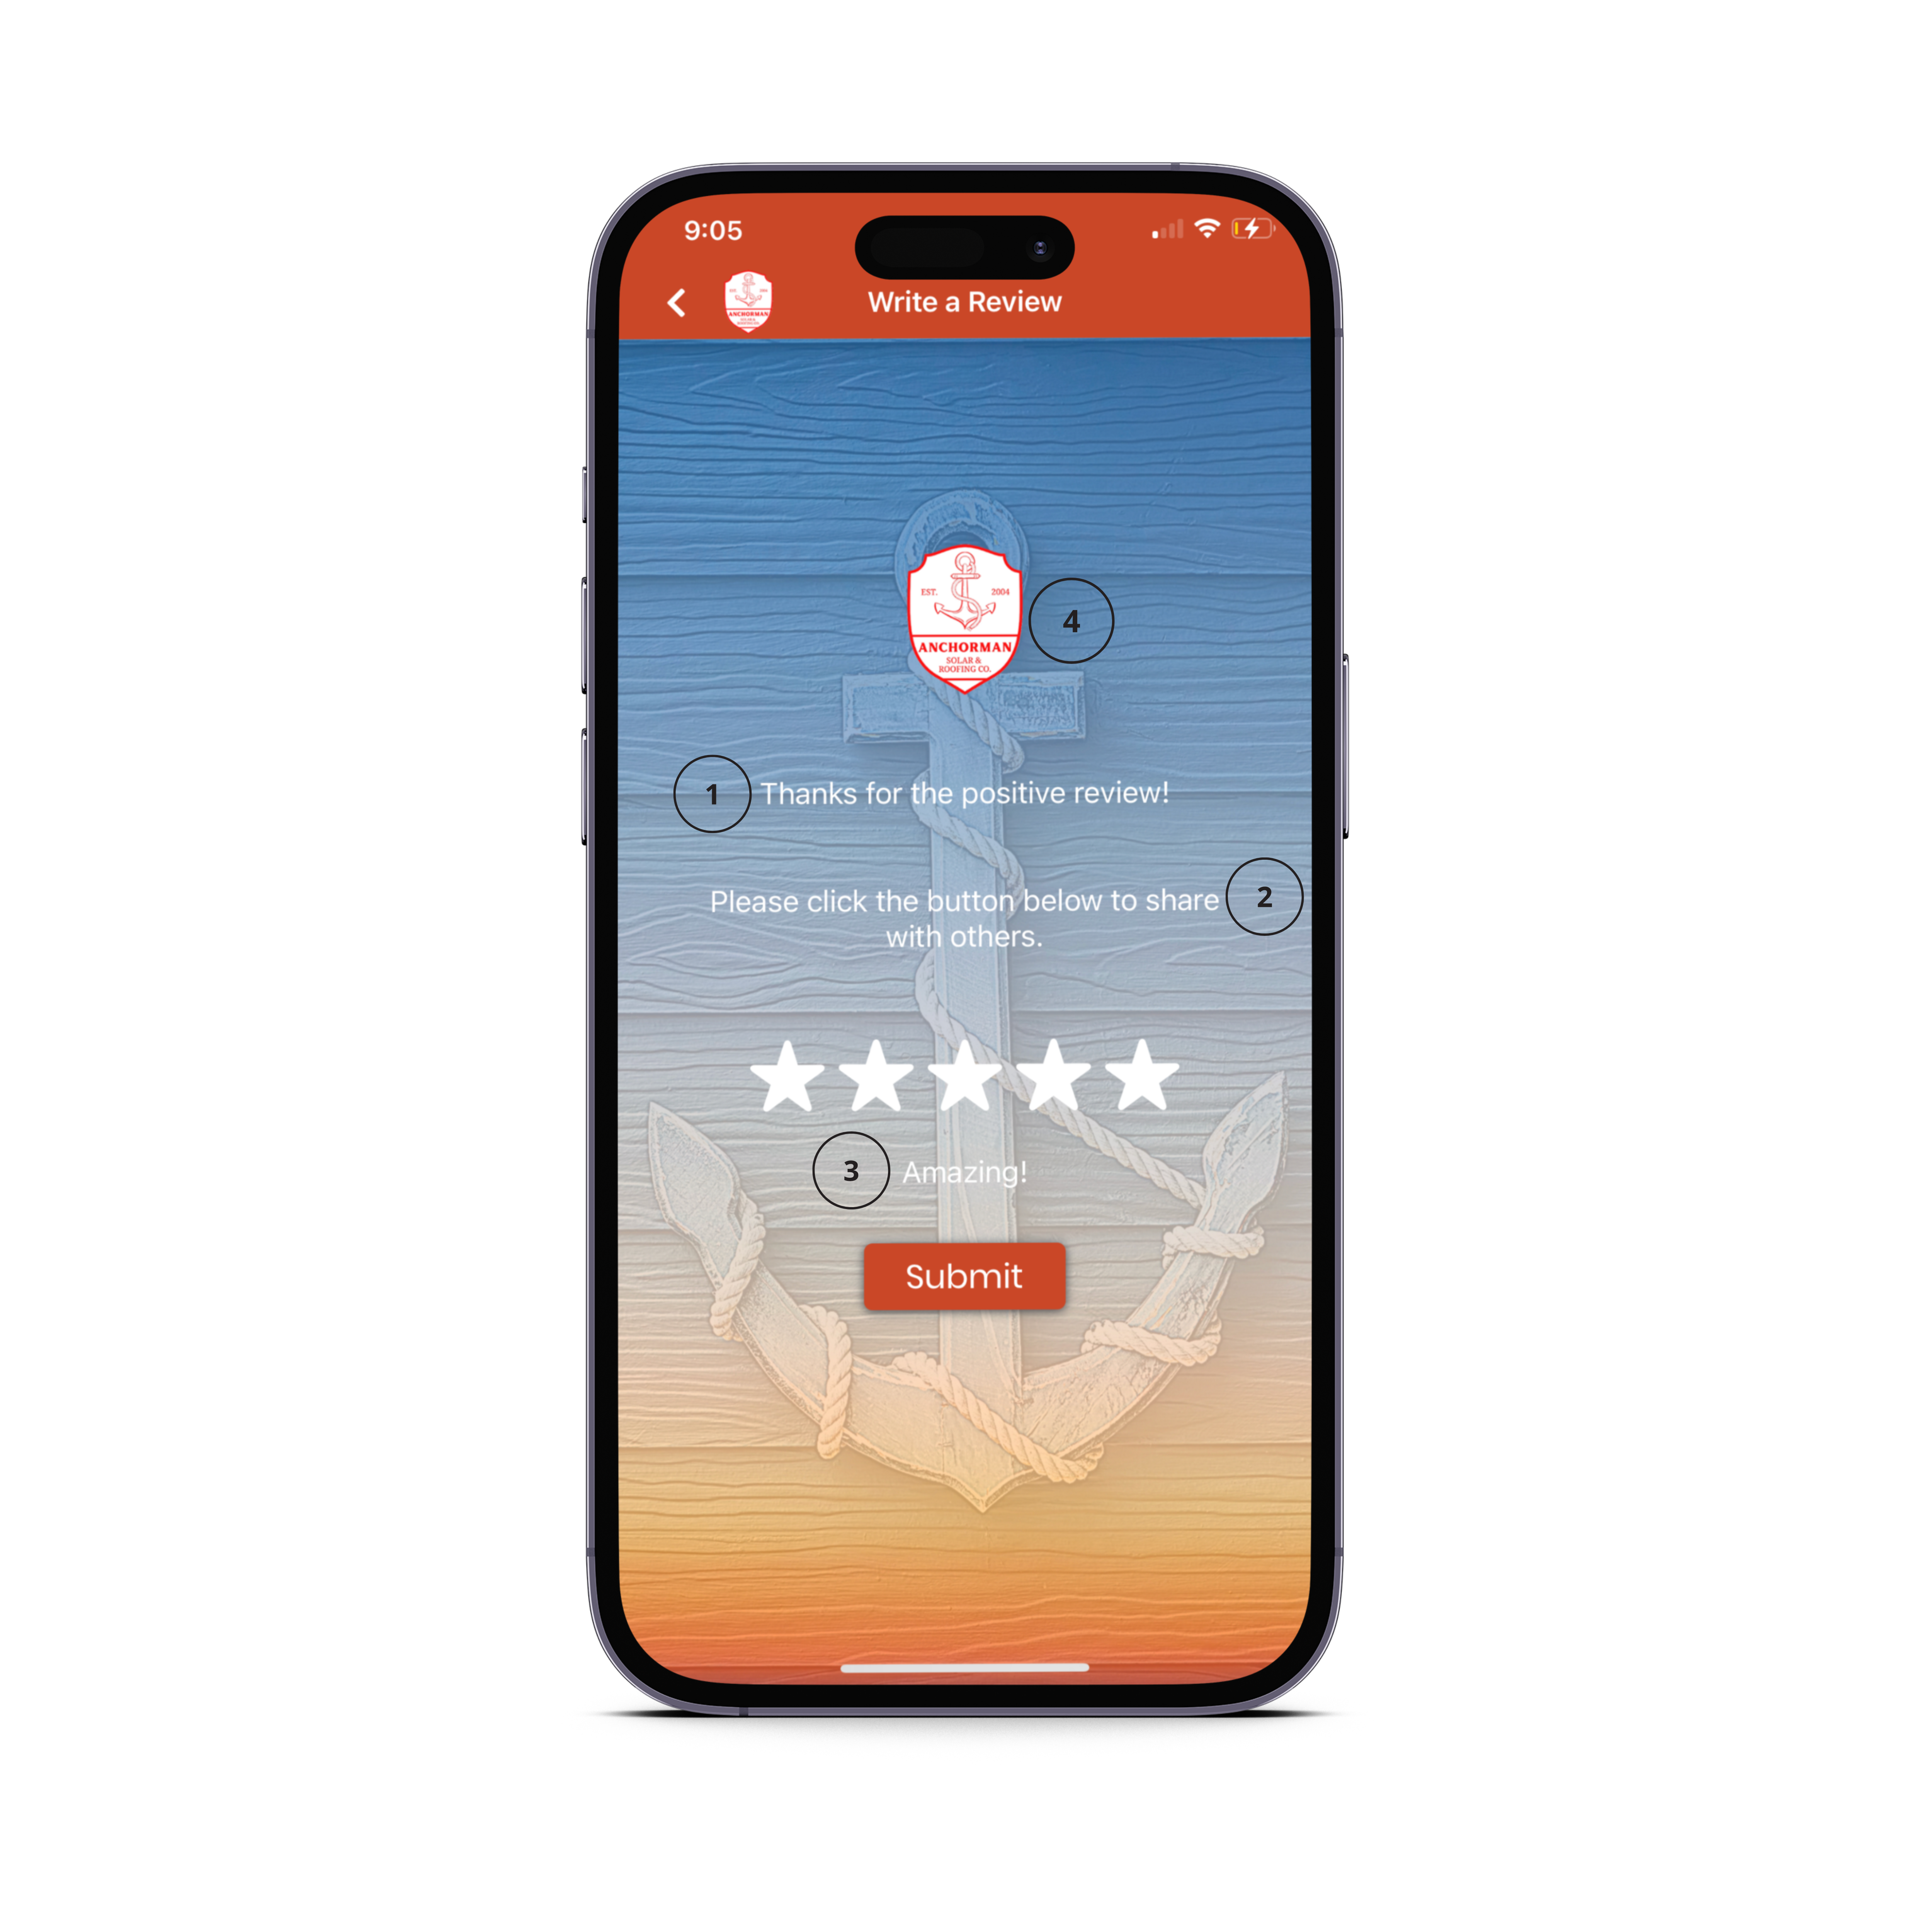
You can also Upload an image your company logo on the page as well by clicking ‘Choose File’
Max Logo Dimensions: (512X250)
Email Manager
Templates are designed to automatically respond to your Advocate based on the stage or response they give.
The templates can be turned on or off, & can select which template matches the title

⚠️ Turning off Notification to Sales Rep
Many Admins may not want to have Sales Reps receive any Email regarding a negative review, as the issue may want to be handled by a manager/ admin before informing the Sales Rep.
If Admins do not want the Sales Rep to see, make sure 'Unsatisfactory Review Notification Sales Rep' is switched to 'Off' 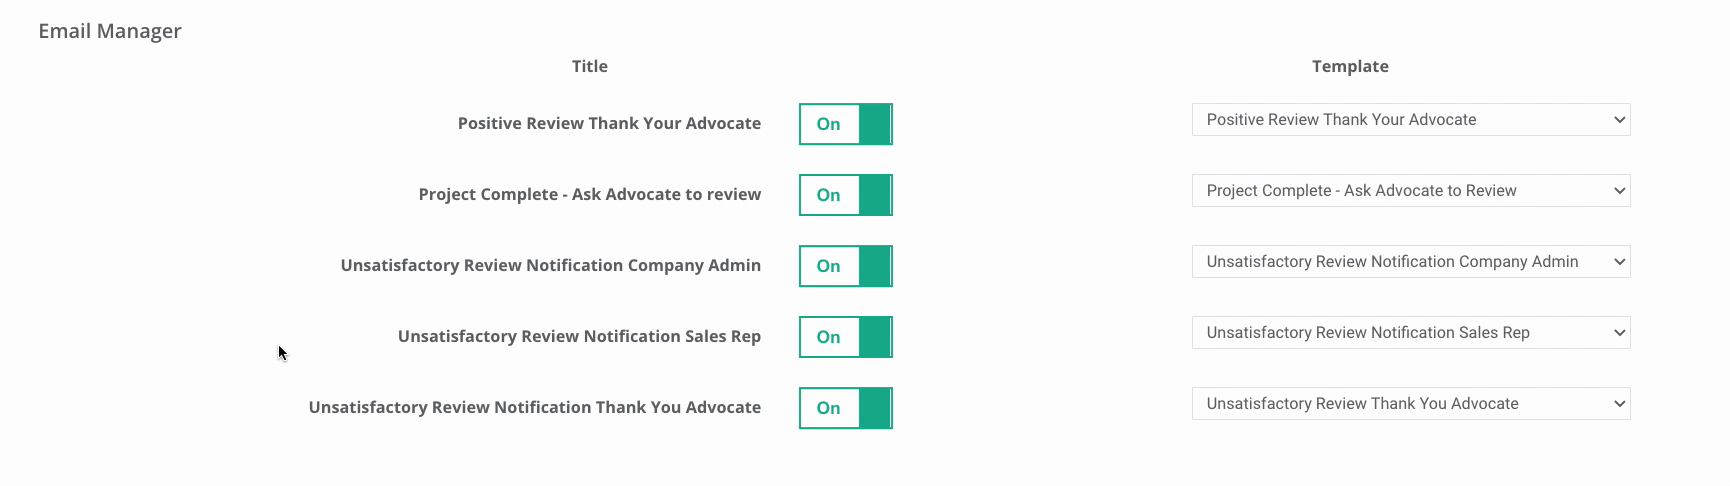
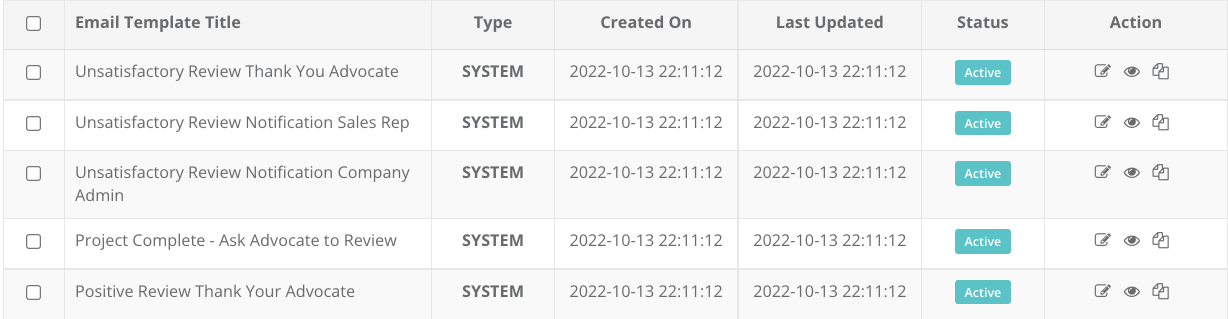
💡Can I edit the Email Templates?
If you want to edit the templates, go to Email Marketing > Email Templates.
If this feature was just turned on, the templates should be viewable on the top of the email marketing list.
Reset to Defaults
Reset to Defaults, located at the top, next to ''App Review Page" will reset the entire settings page back to the default settings GTR gives you.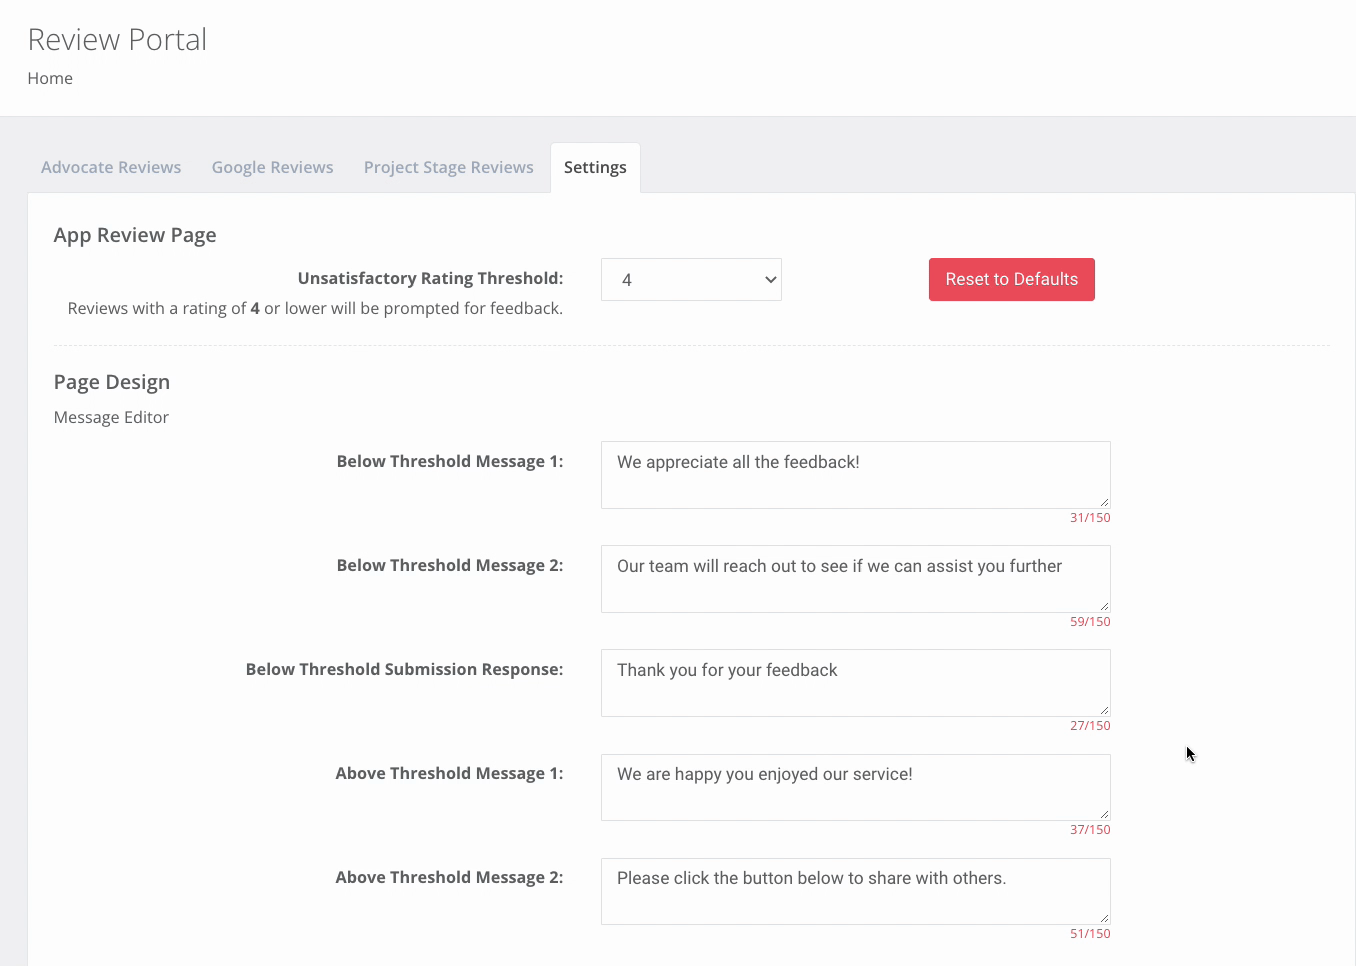
Project Stage Reviews
Location: Review Portal > Project Stage Reviews
Push notification and email can be triggered from multiple project stages. Company Admins can configure which stages will trigger PN and/or email, and the template to be used in each stage.
In Project Stage Reviews, admins have the option to
- Choose the project stage
- Choose the auto email template to Advocate
- Choose the auto push notification to Advocate
Steps to implement Project Stage Review
- Choose the Project Stage,
- Then select which triggers you want on
- Then you can select your template
- Click ‘Save’
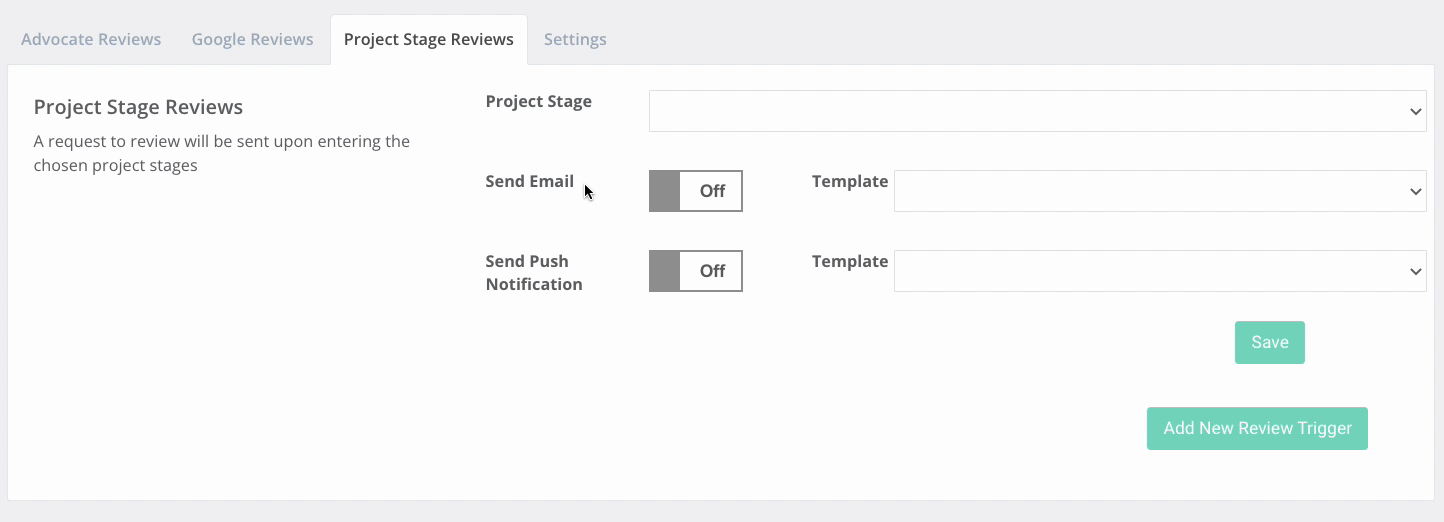
Add & Delete Project Stages
- From here, you can ‘Add New Review Trigger’ and configure other Project Stages
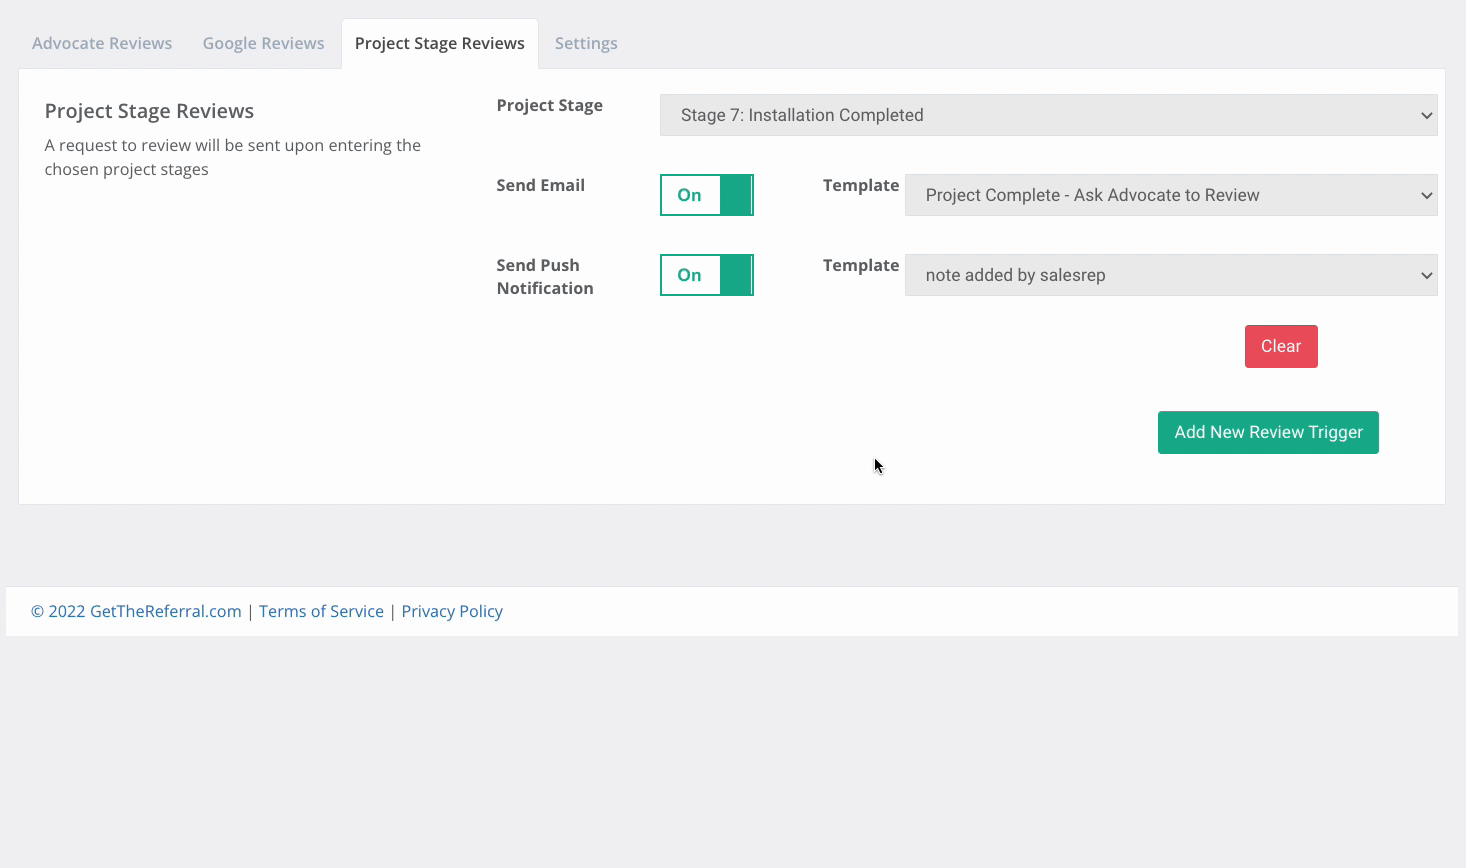
💡Important Note: Only one email and/or push notification may be set for a specific stage. If a specific stage is present more than one time, all but one will be automatically deleted when saving the page to prevent multiple notifications for the same stage.
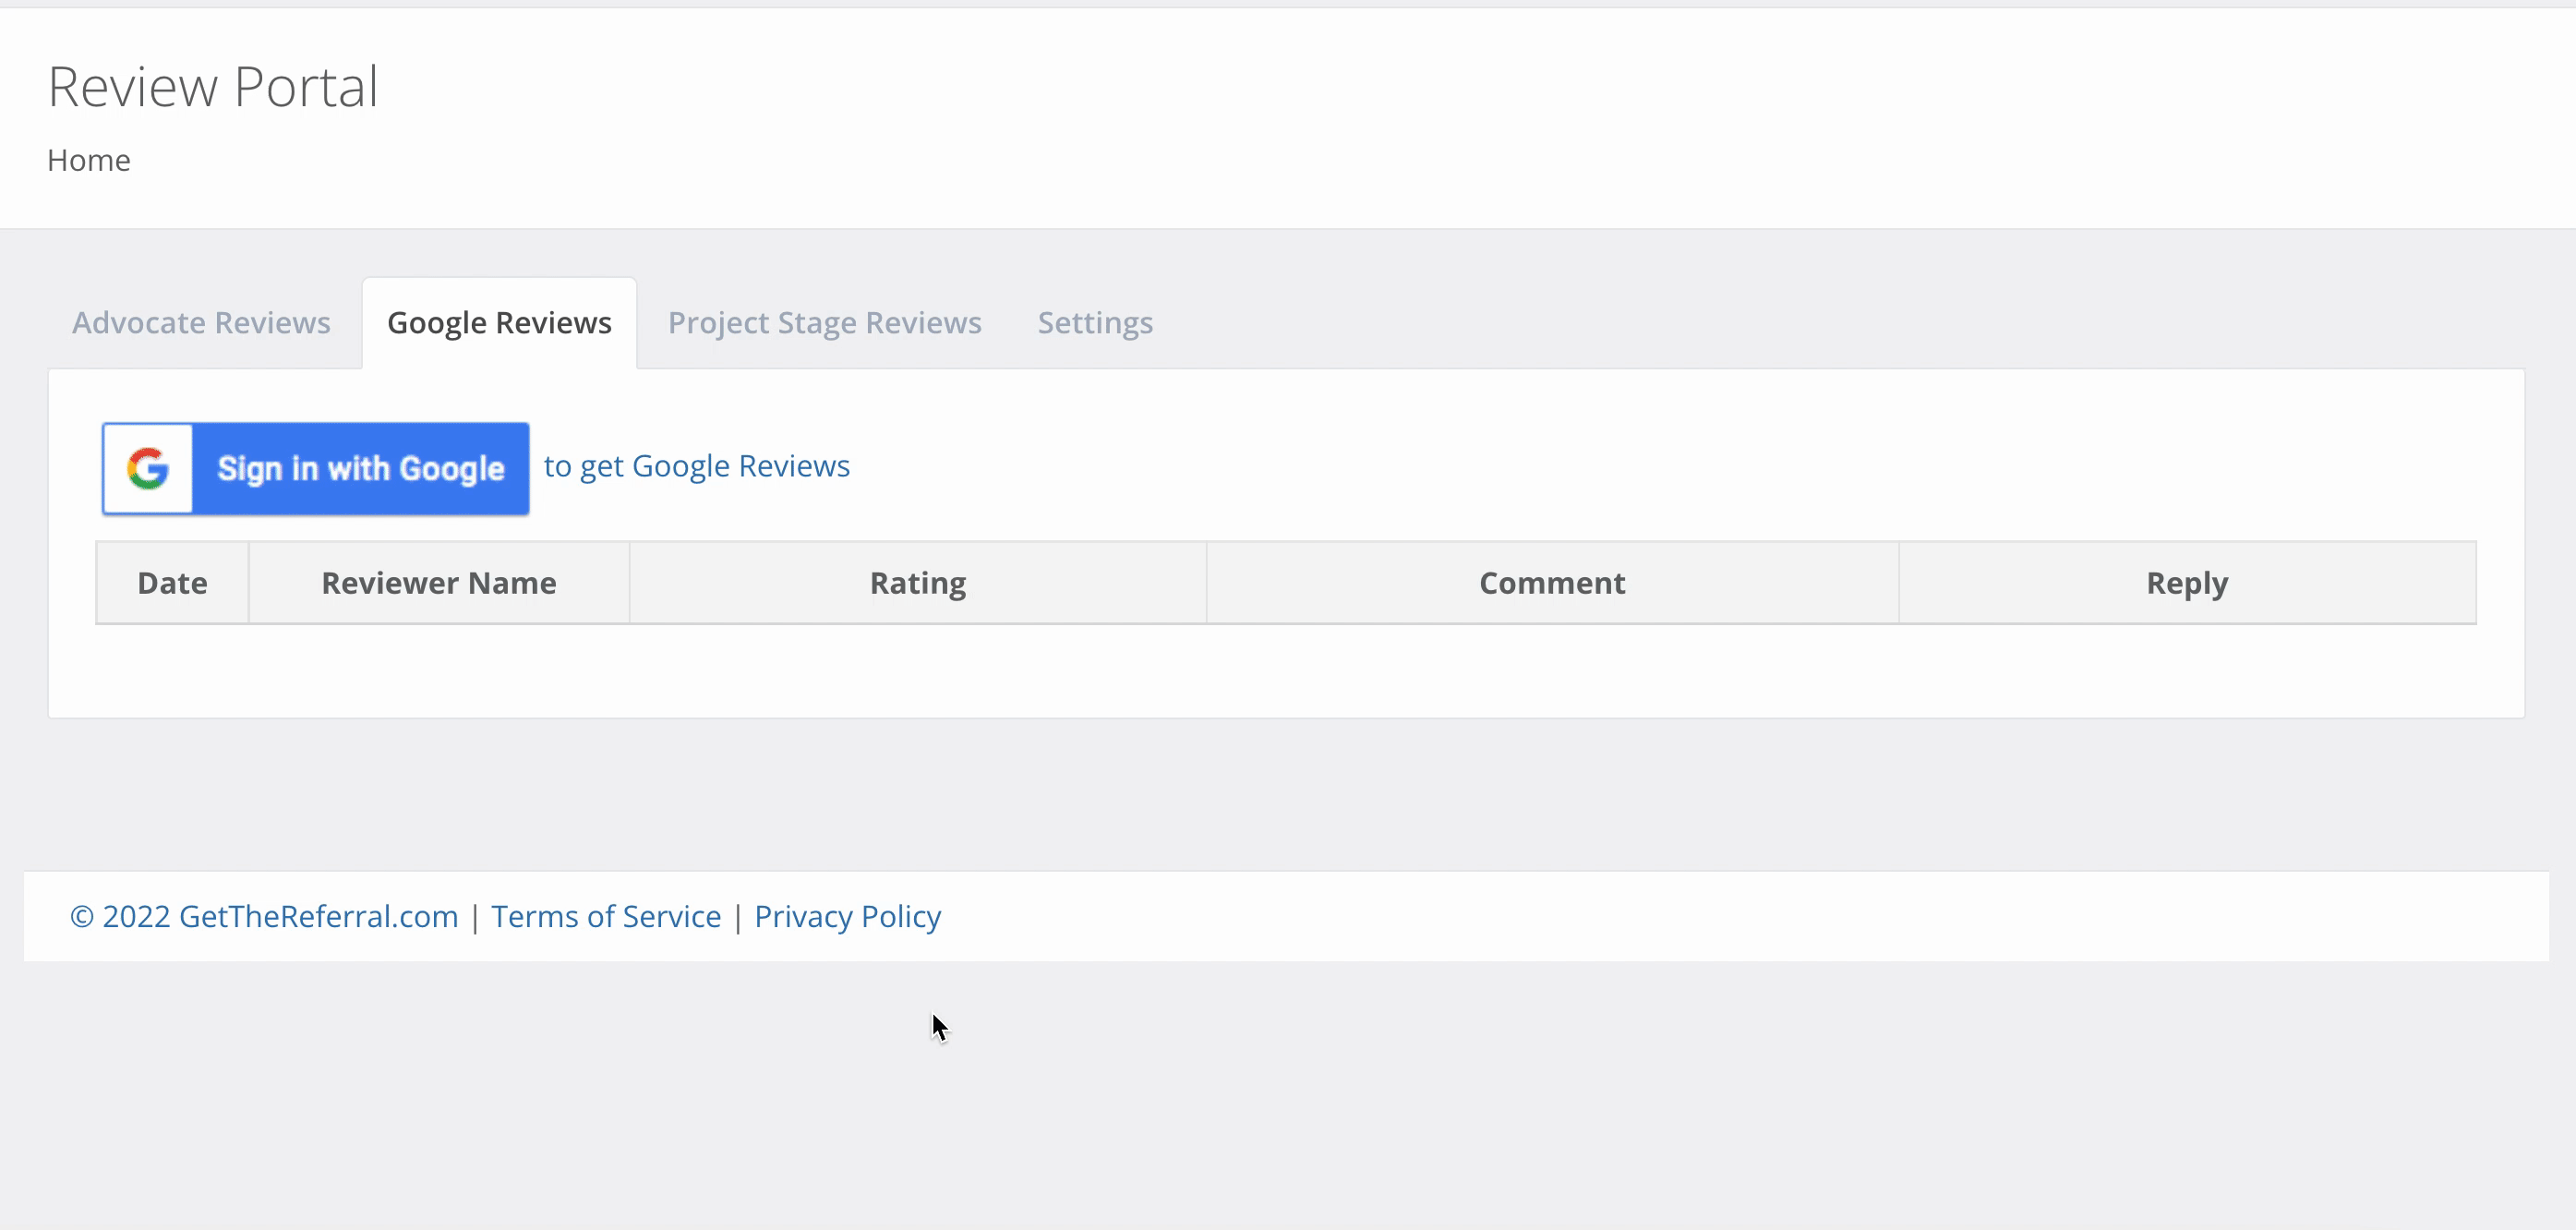
Google Reviews
Location: Review Portal > Google Reviews
Now that we have configured both our Settings & Project Stage reviews, we are going to cover how to implement Google Reviews
Google Review Sign In
Google Reviews is a very simple step, all that is needed is your Google Login at the top left corner of the Google Reviews Screen.
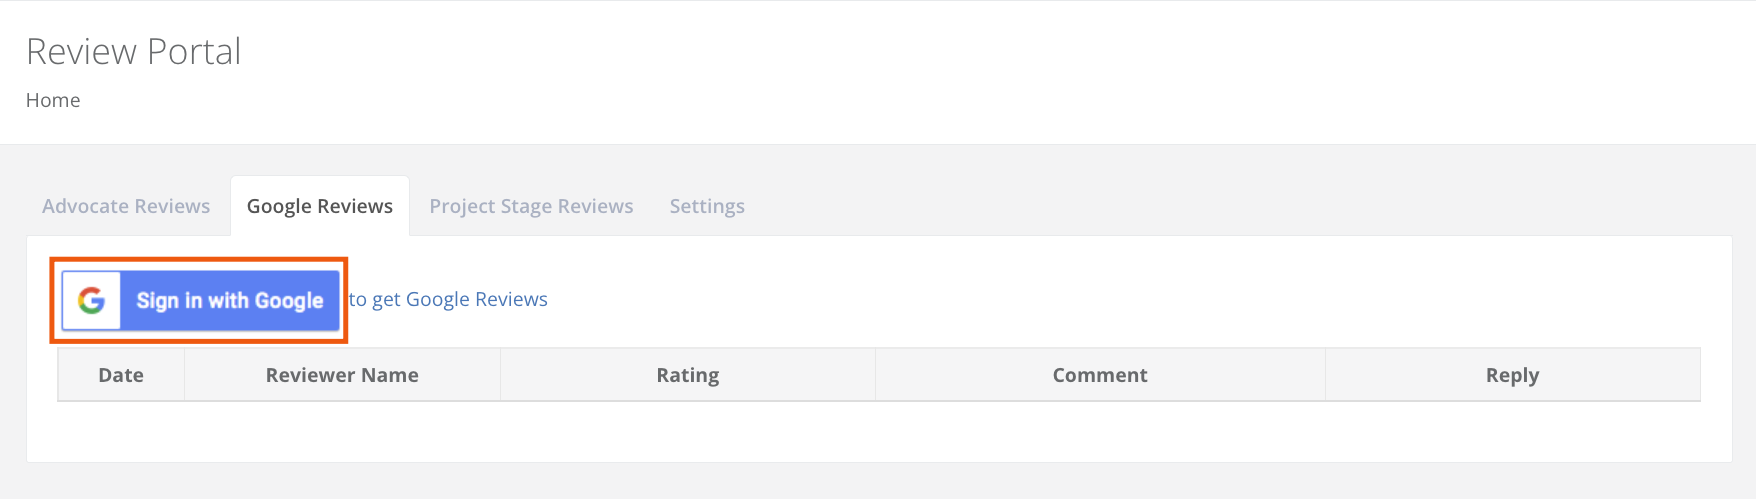
🛎️ Warning: The Google Account must be the account that receives Google Reviews already, not a personal or work account.
Once signed in, your previous and future emails will be shown in the Dashboard.
Congratulations! Everything in the Review Portal should be set up and ready to go.
Next Section we will be covering what features are Available for you and your team to use.
To view the Part 2 Tutorial, Click Here