Manage Sales Reps
The SalesRep management is a tool for the company admin to manage Sales Reps, including analytics on their performance
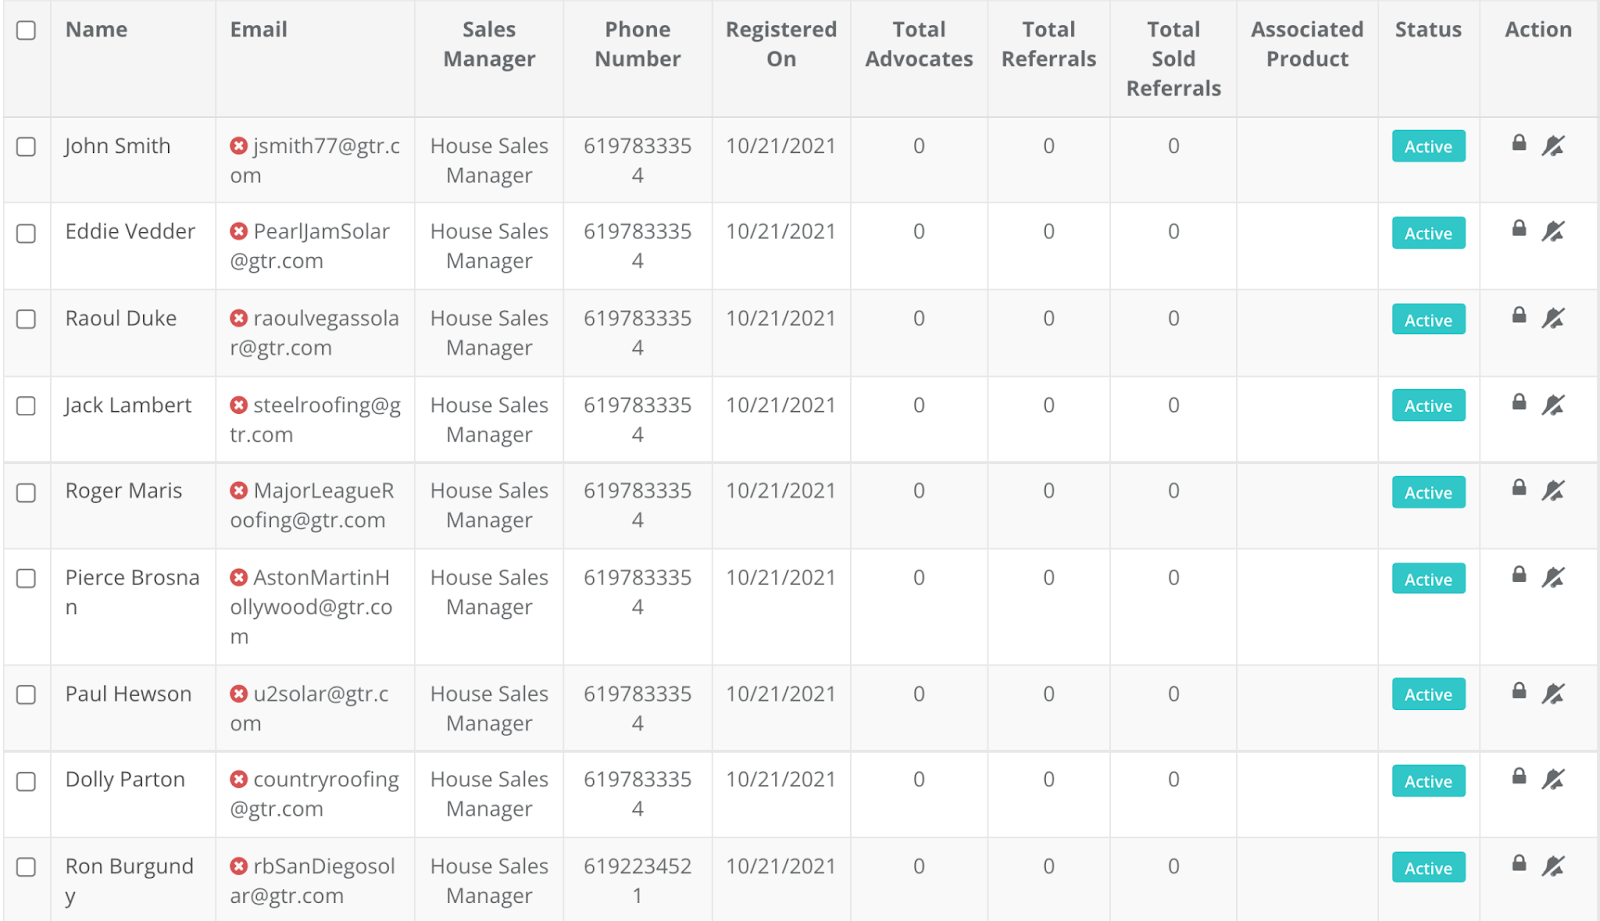
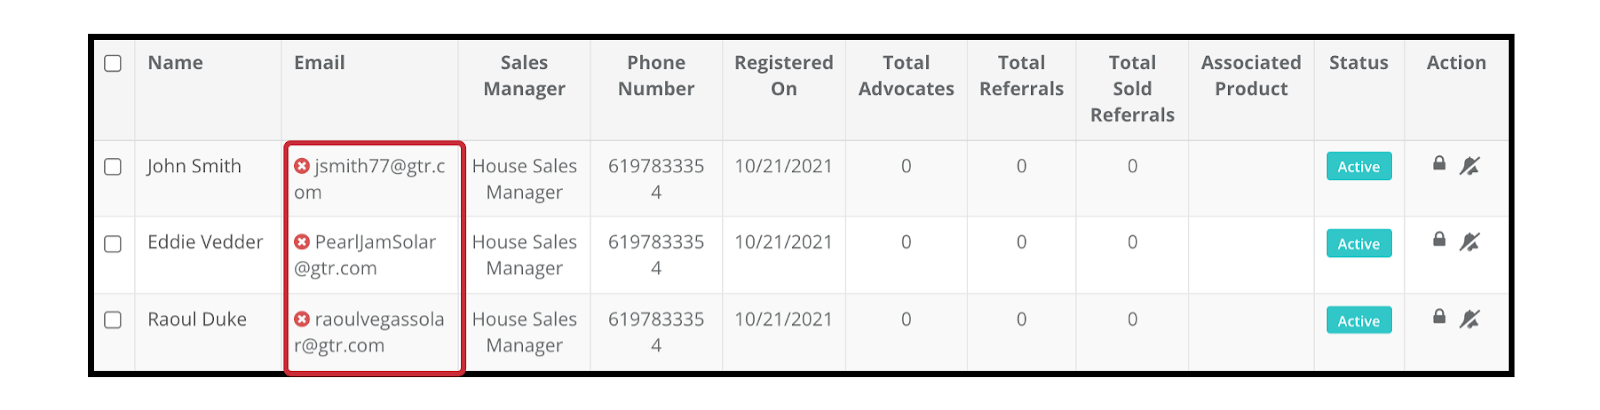
Location: SalesReps > All
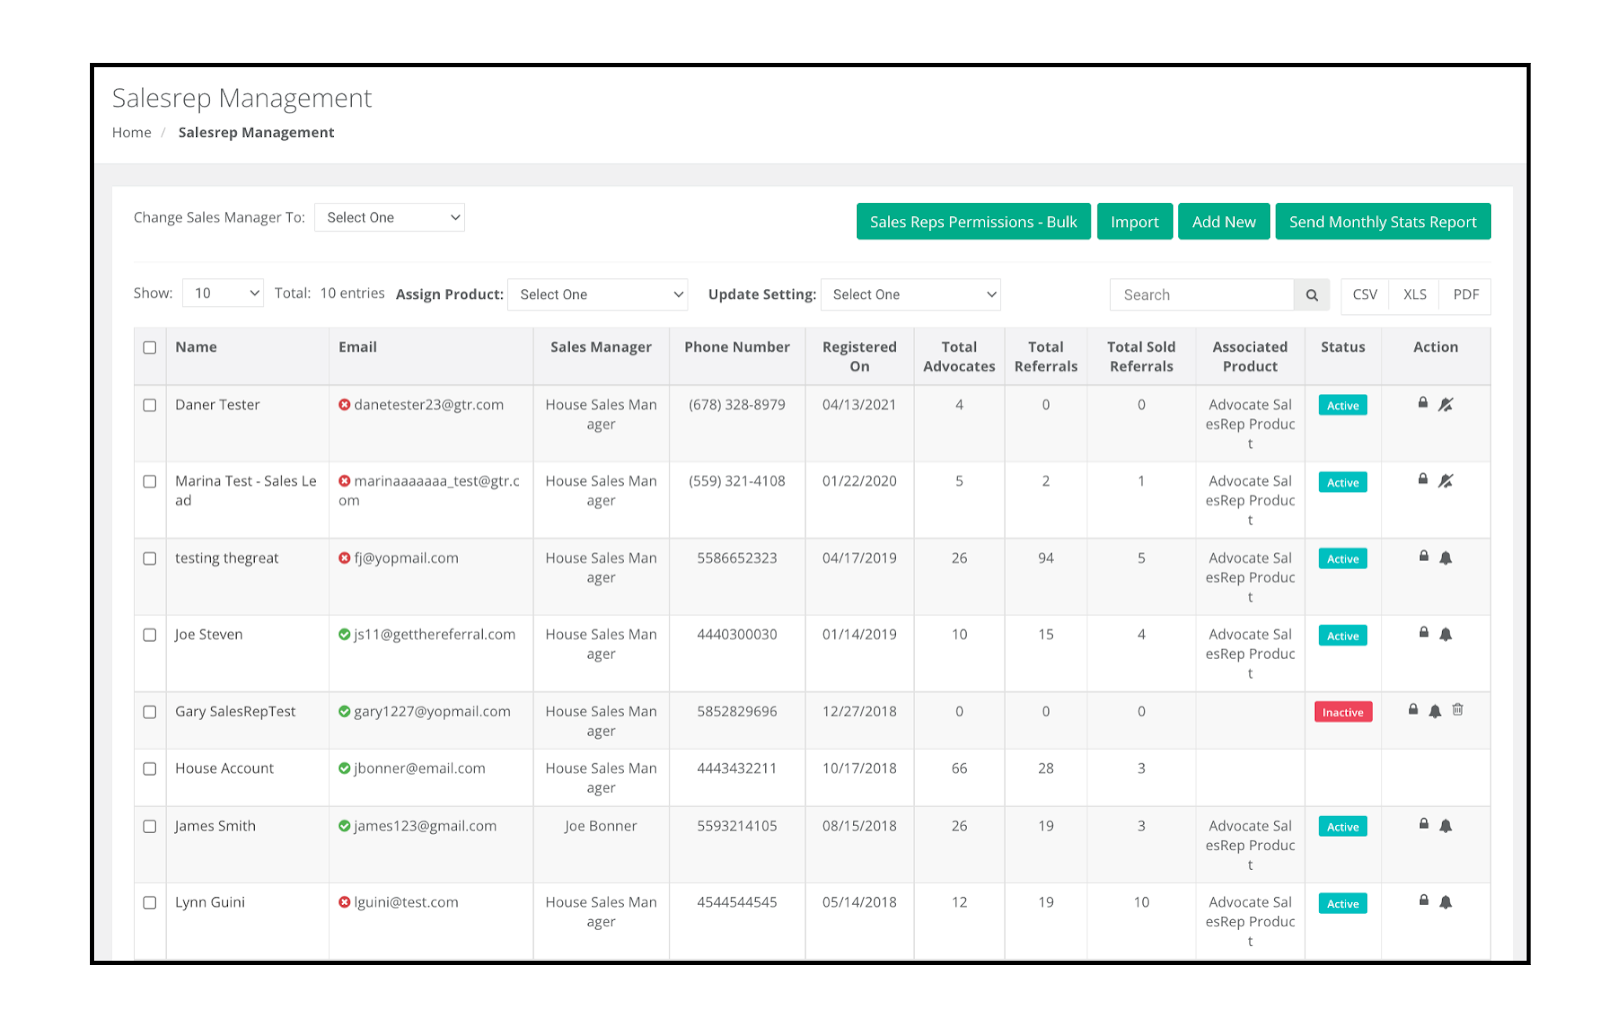
Clarifying Header Rows in SalesRep Management:
- Total Advocates: How many advocates are under an individual SalesRep
- Total Referrals: How many of the advocates have produced referrals under an individual SalesRep
- Total Sold Referrals: How many referrals that have produced referrals that have resulted in a sold deal
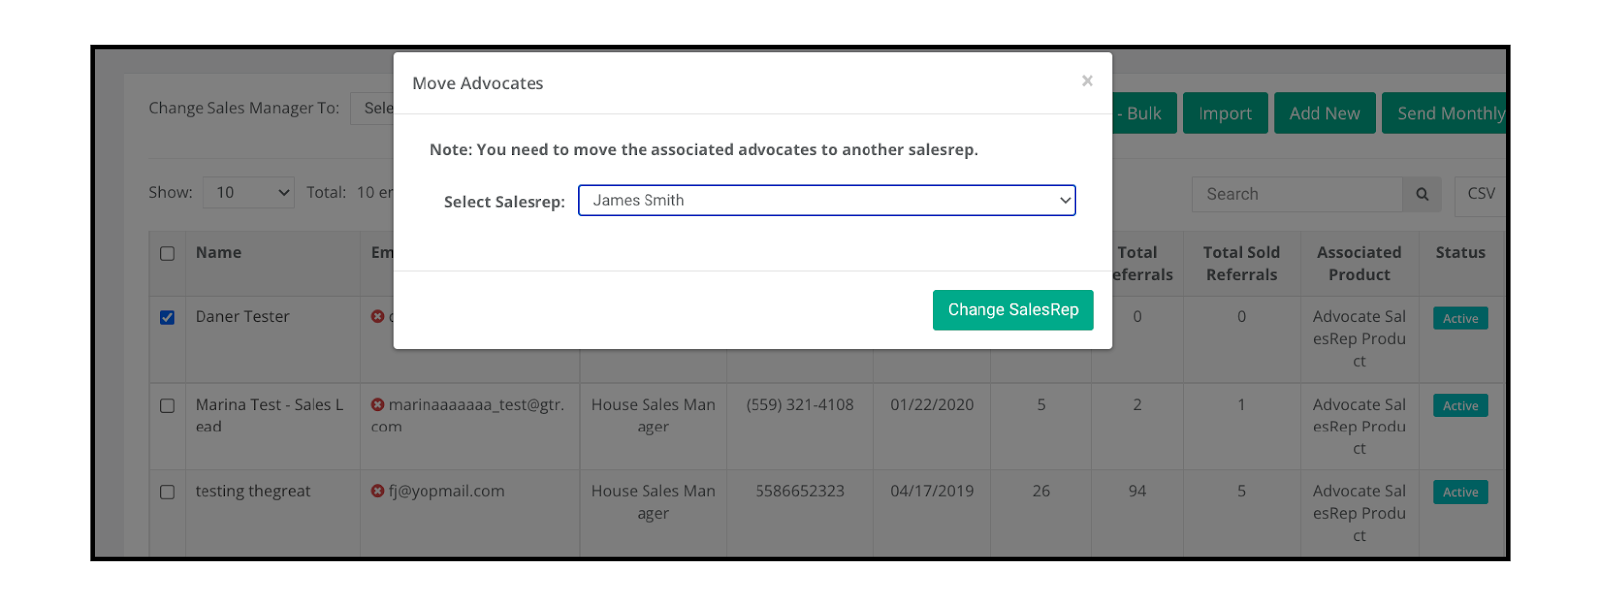
How to activate, deactivate & remove Sales Reps
When a salesrep is removed from the Status as “Active” to “Inactive”, all of the advocates under the salesreps name need to be transferred to another salesrep.
When selecting the user, and changing the Status, a pop up box will appear with an option to transfer all the salesreps to an individual.
- When clicking on the drop down list, all of the “Active” salesreps will be shown.
- In order to transfer to a specific SalesRep, the SalesReps status must be “Active”
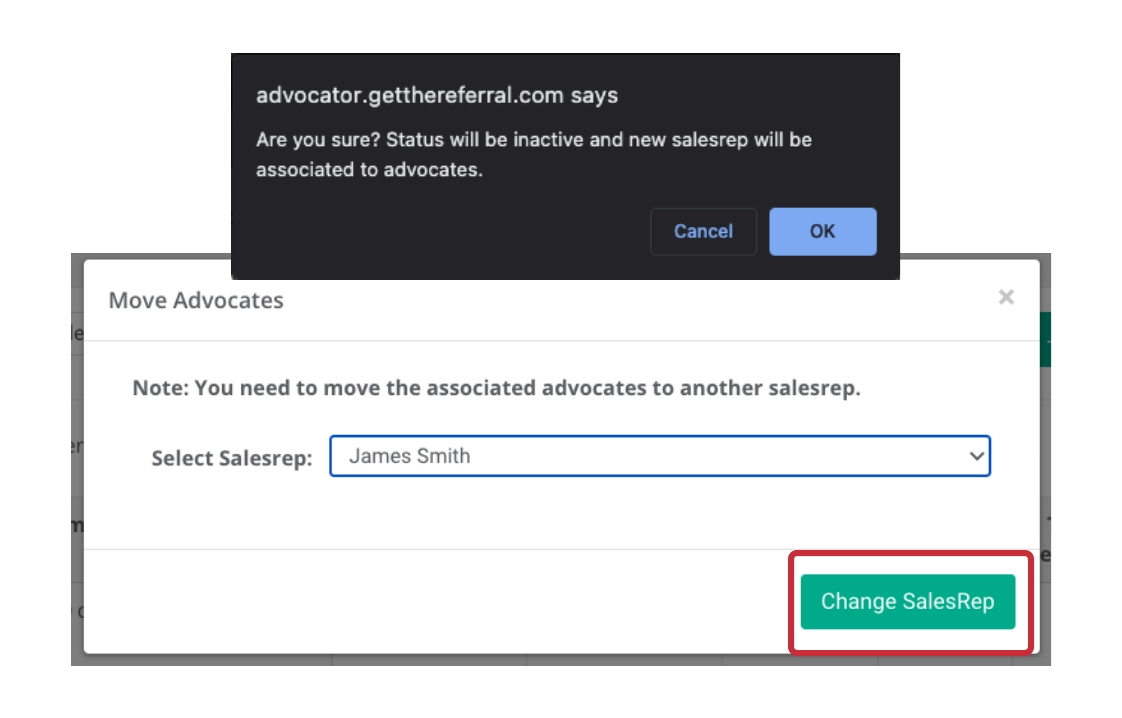
Once “Change SalesRep” is selected, confirm the pop up
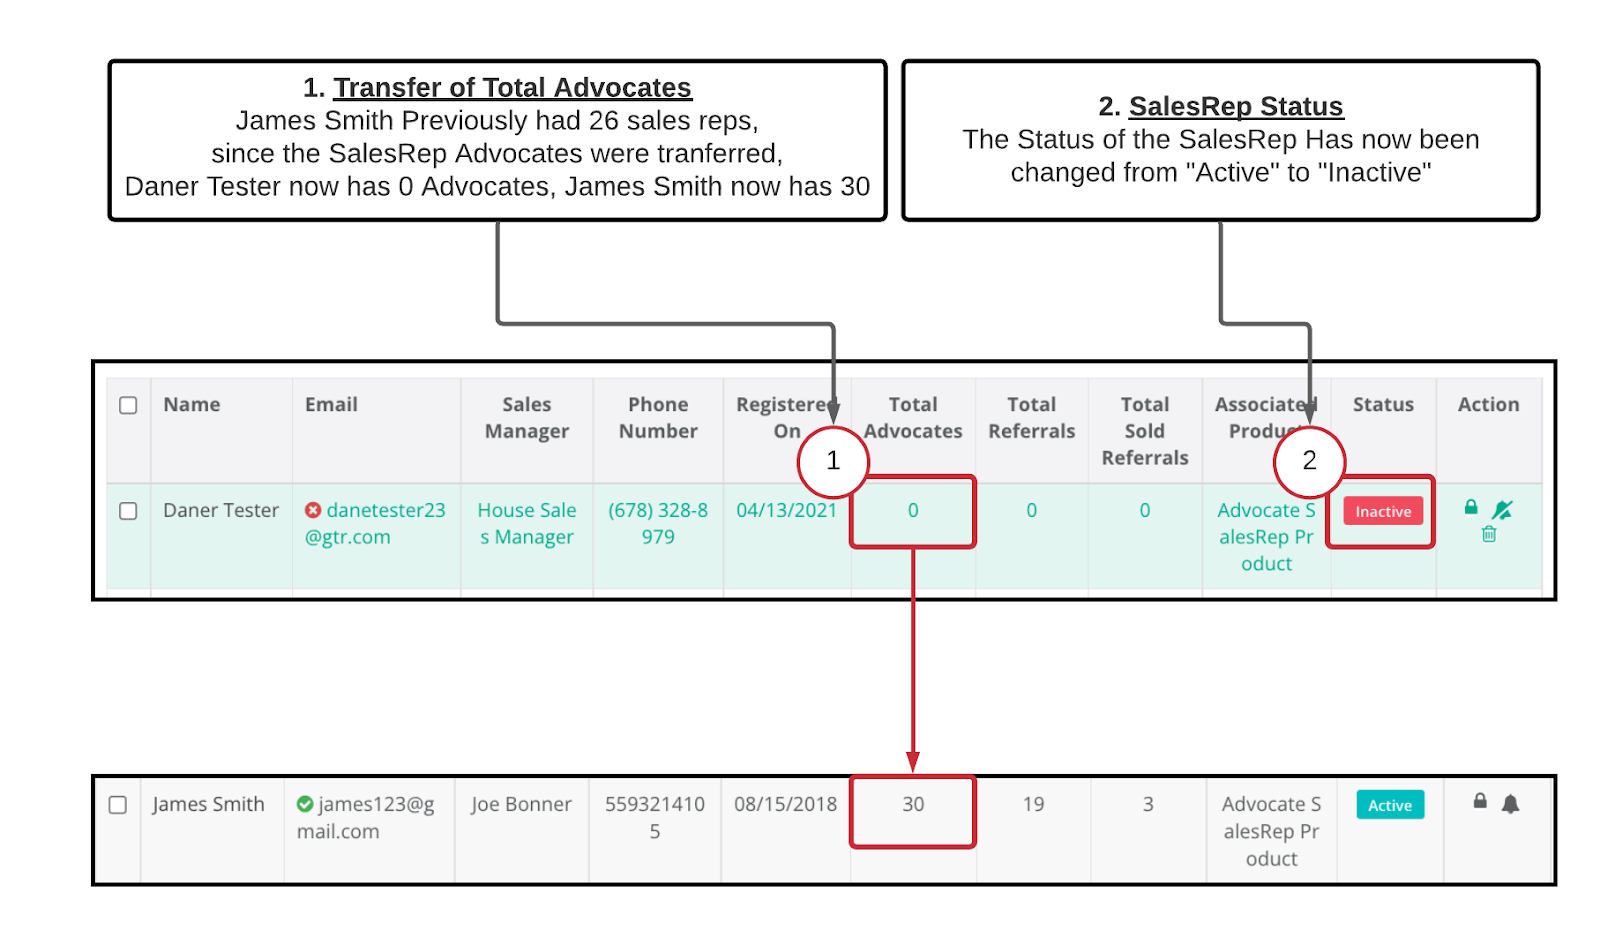
Two changes are made when Sales Rep change is applied
- Transfer of Total Advocates
- SalesRep Status
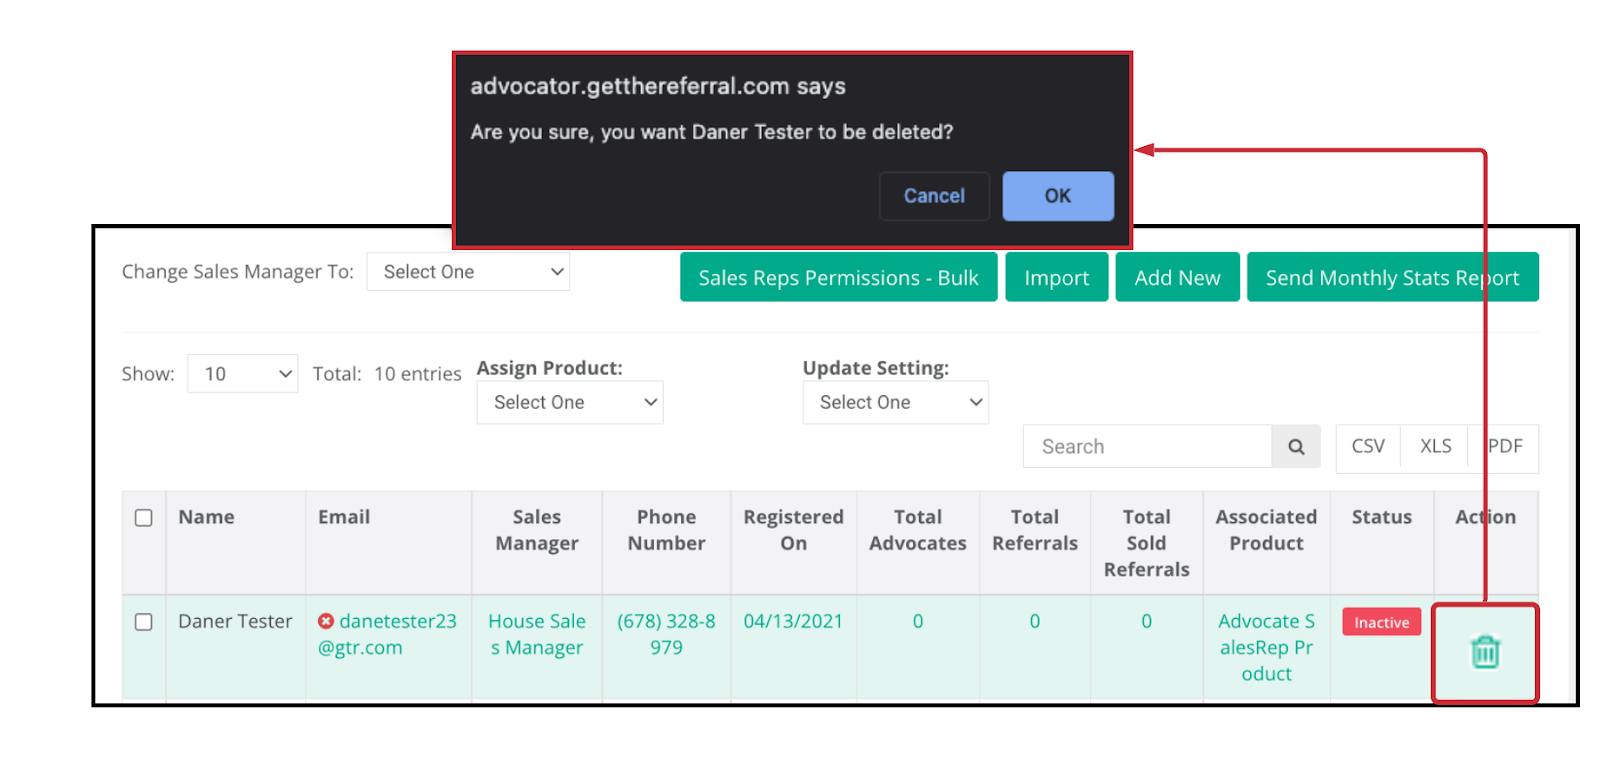
How to remove the Sales Rep from the system entirely
In order to remove the SalesRep, the previous steps to switch the SalesRep to “Inactive” must be completed.
Once completed, click on the Trash Can Icon to delete the SalesRep
How to Import Sales Reps Individually and in Bulk
In order to add a new Sales Rep Individually, click on the “Add New” button
A form will pop up with necessary fields to add your own Sales Rep
*Remember, you can send out an registration forms for a Sales Rep instead of the company admin manually inputting Sales Reps*

If “Add SalesRep As Advocate” is checked, the Sales Rep will have access to the application similar to a customer Advocate

In order to add Sales Reps in bulk, there is a button next to “Add New” called “Import”
This is different than the other processes’ for adding Sales Reps, while it is fast and efficient; spreadsheet experience is helpful
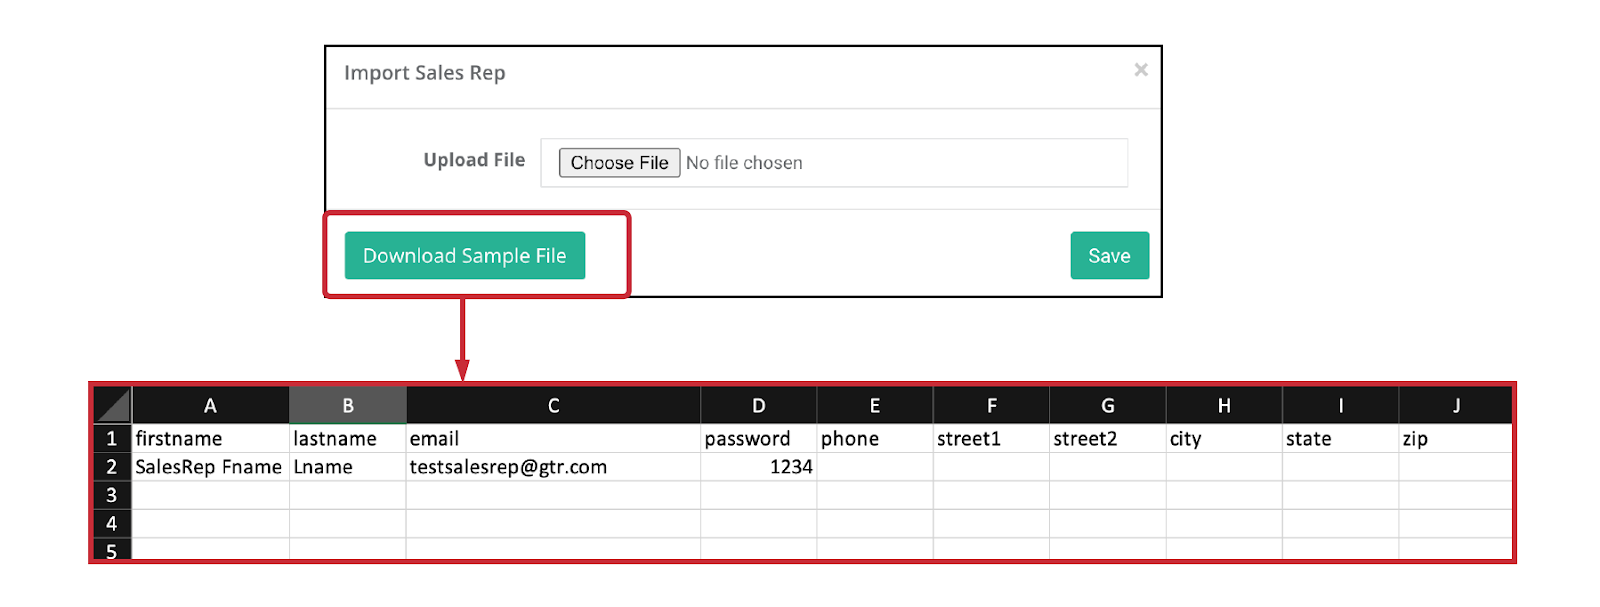
The Header Rows are the field categories, and must be followed in that order.
“firstname”, “lastname”, “email”,”password” are the required fields to be entered, the rest of the fields are optional.
*Below is an example of a filled out fields*

*Note, if edited in excel, the file must be formatted as a CSV File to upload *
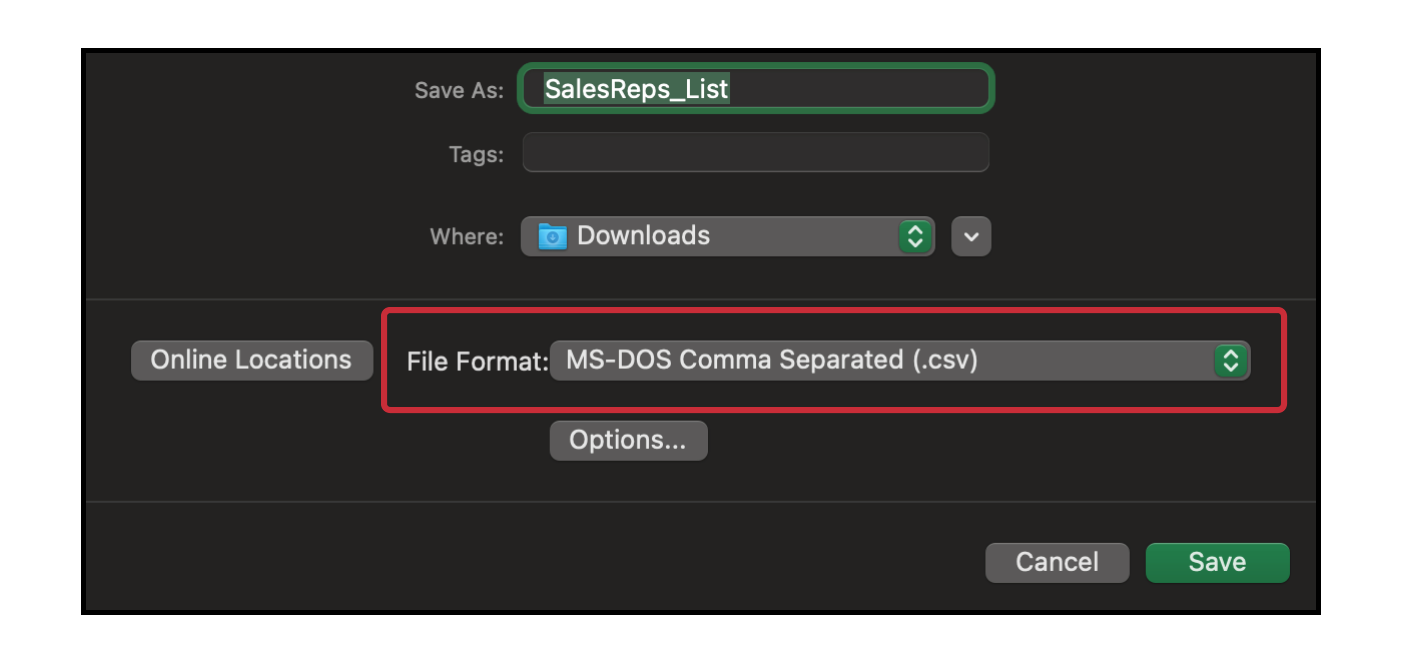
- Proceed to Upload the CSV File
- Save to import the SalesRep List
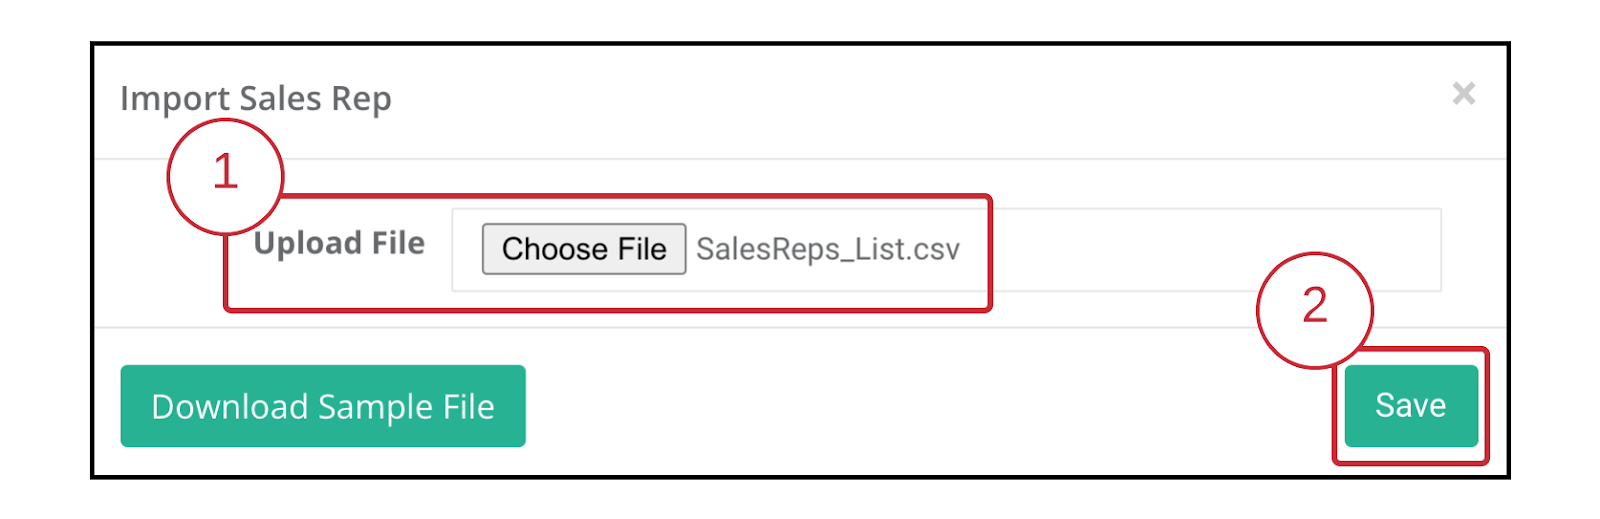
Congratulations! Your Sales Rep list is automatically imported into the Sales Rep list
Until the Sales Rep accepts the invitation and sets up an official password, the red check marks will appear even if the account is “Active”
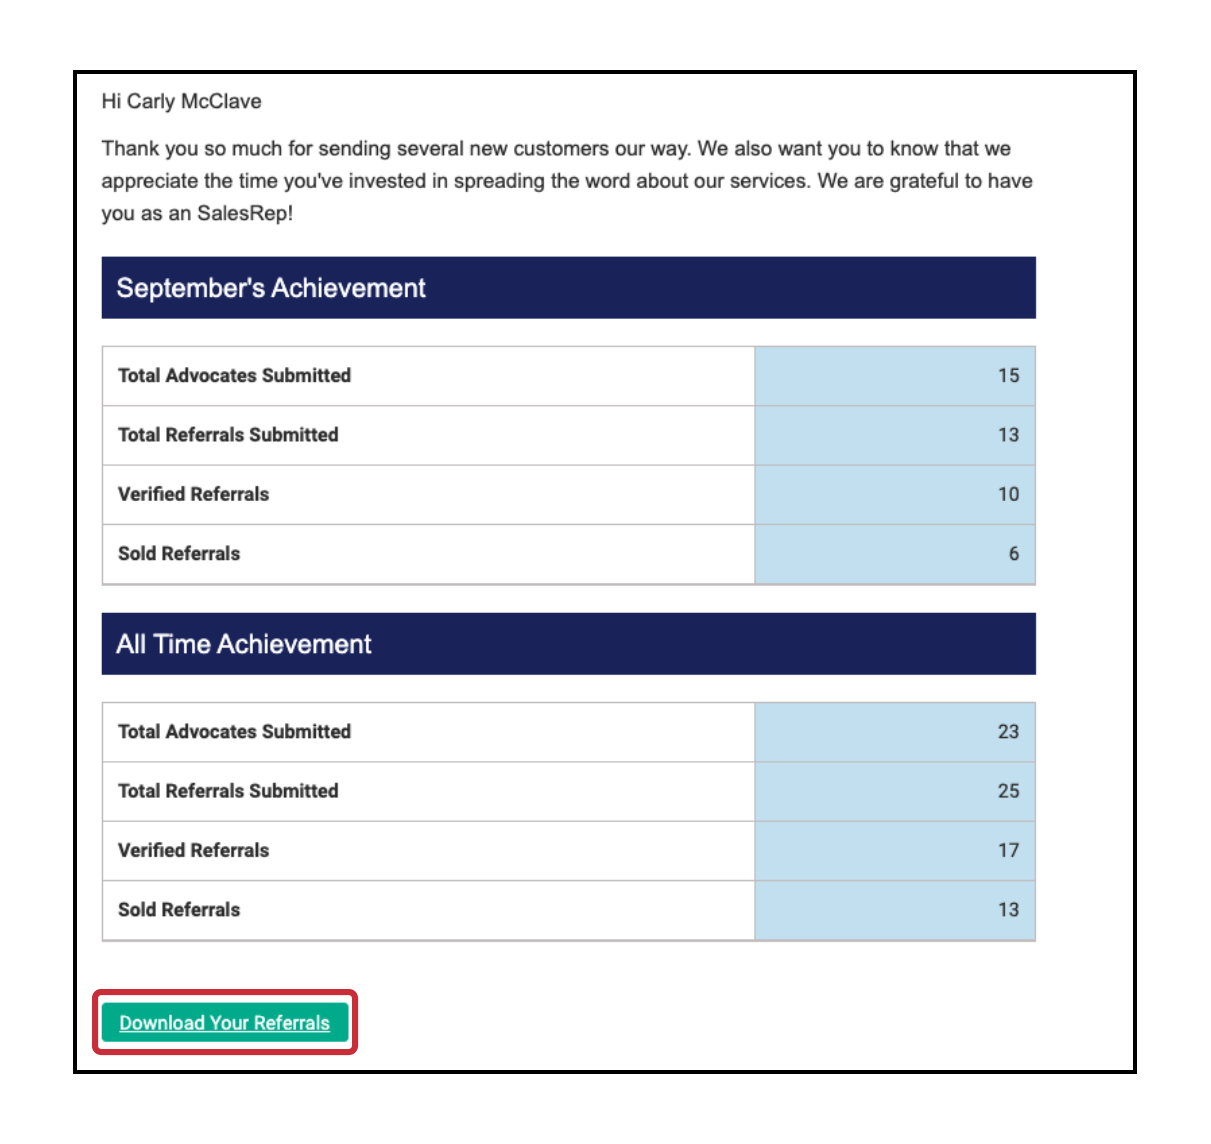
Send Monthly Stats Report to your Sales Reps
Monthly reports sent to a company’s Sales Reps can be an easy way to inform how they have performed during the most recent month, including an All Time Achievement comparison.
In order to send out a monthly stats report, either checkmark individual SalesReps or Check All to send to every SalesRep

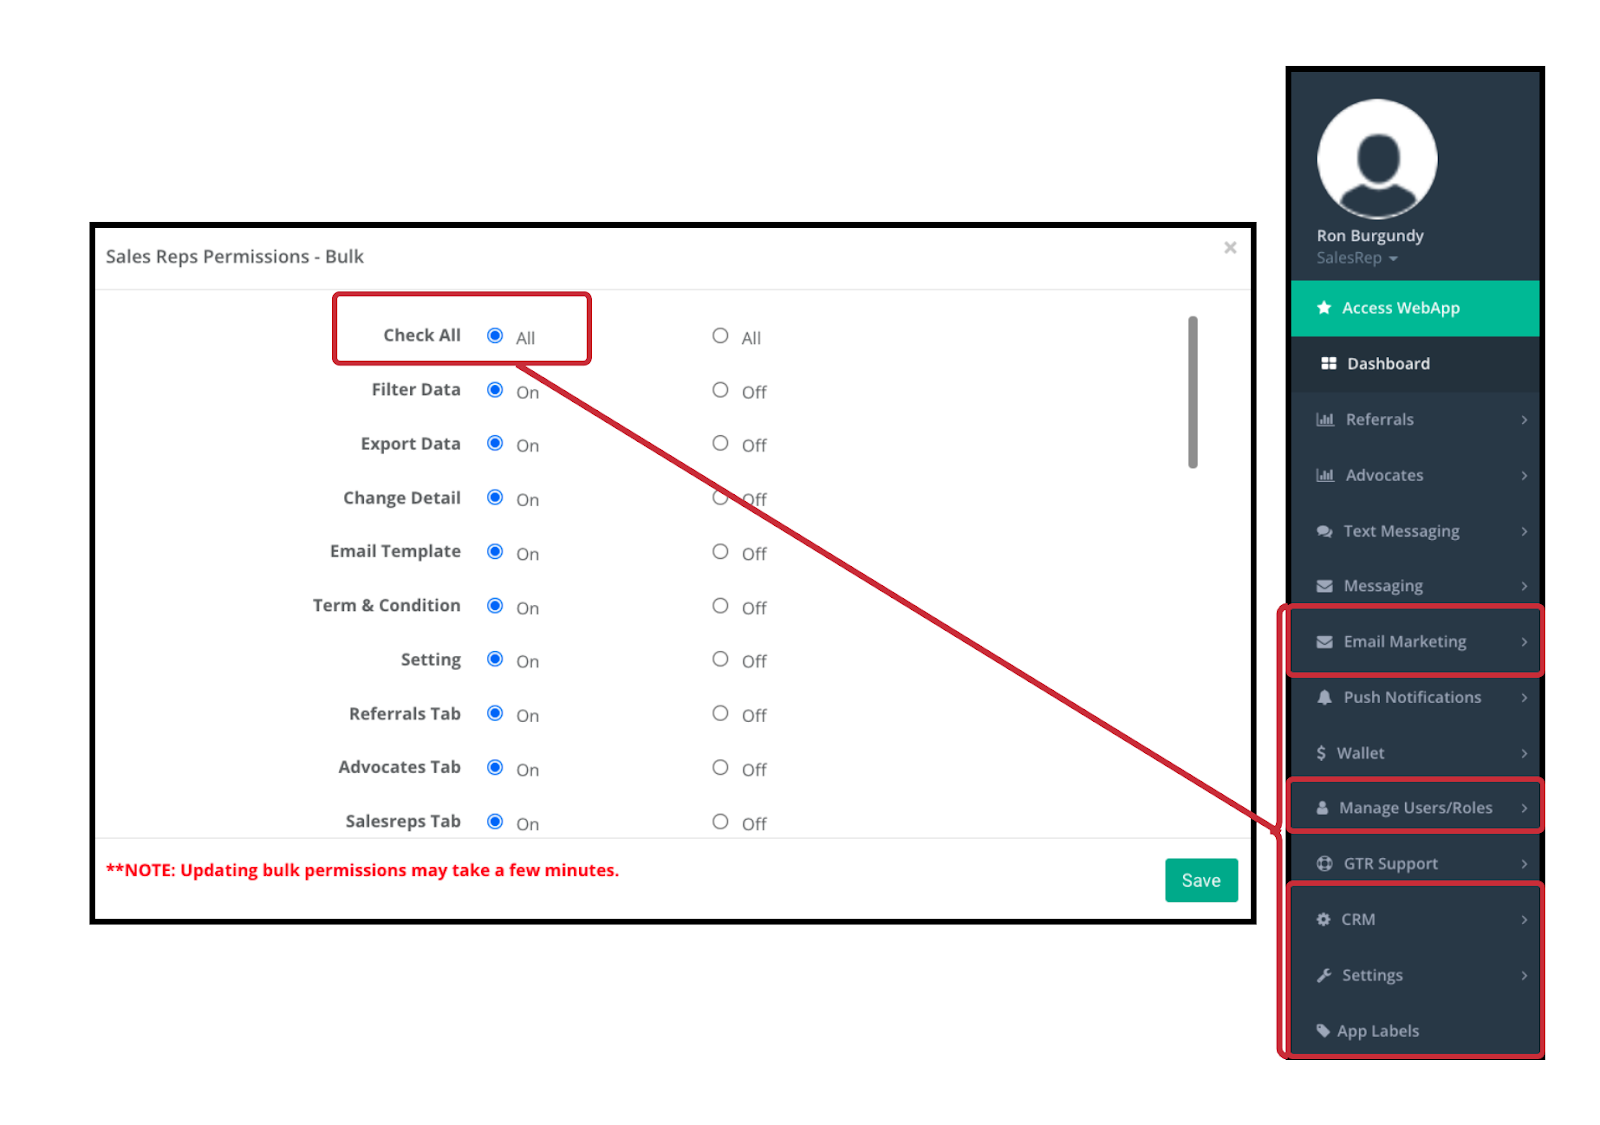
Giving SalesRep Dashboard Permissions
While the company admin has control over all features of the dashboard, the SalesReps are limited to the amount of features in their dashboard.
GTR has enabled Company Admins to give SalesReps permissions, individually or in bulk based off the checkmarked SalesReps

Default for SalesReps Permissions
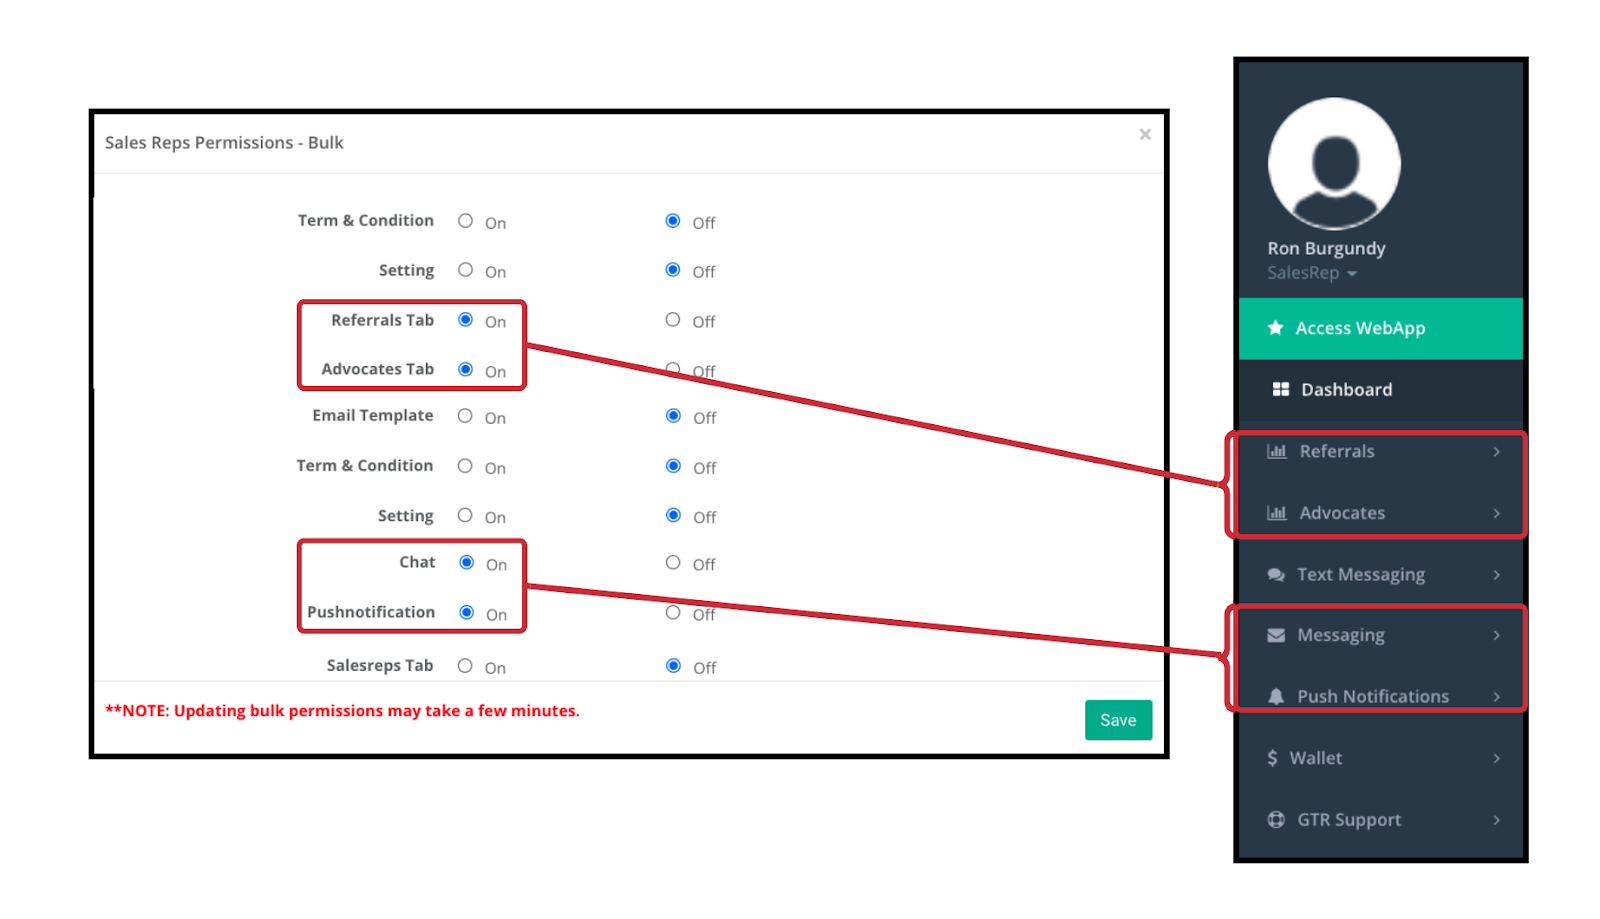
“Check All” for SalesReps Permissions
If the Company Admin wants every single feature available for SaleReps, “Check All” is an easy solution
Pro Tip: GTR recommends that access to these features is limited to certain SalesReps, as “Check All” can enable them to change something in the dashboard or application that the Company Admin may not want changed
Advocate SalesRep Management
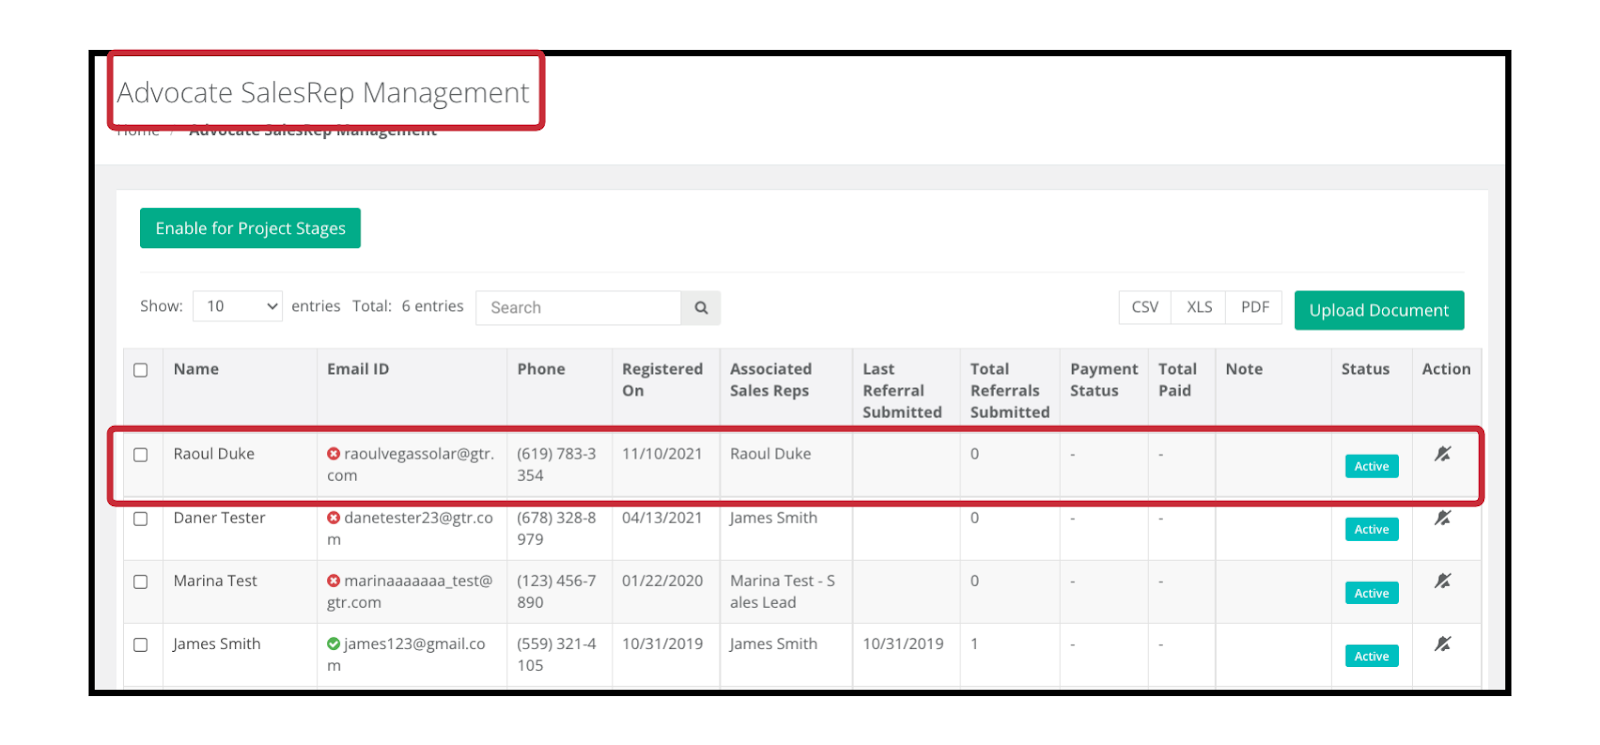
What are Advocate SalesReps?
Advocate SalesReps are SalesReps with access to the Application, and can send in referrals to advocates through the Application
To activate for your SalesReps as Advocates go to
Location: Sales Reps > Active
- Once on the SaleRep Management Page, click on the SalesReps name to proceed
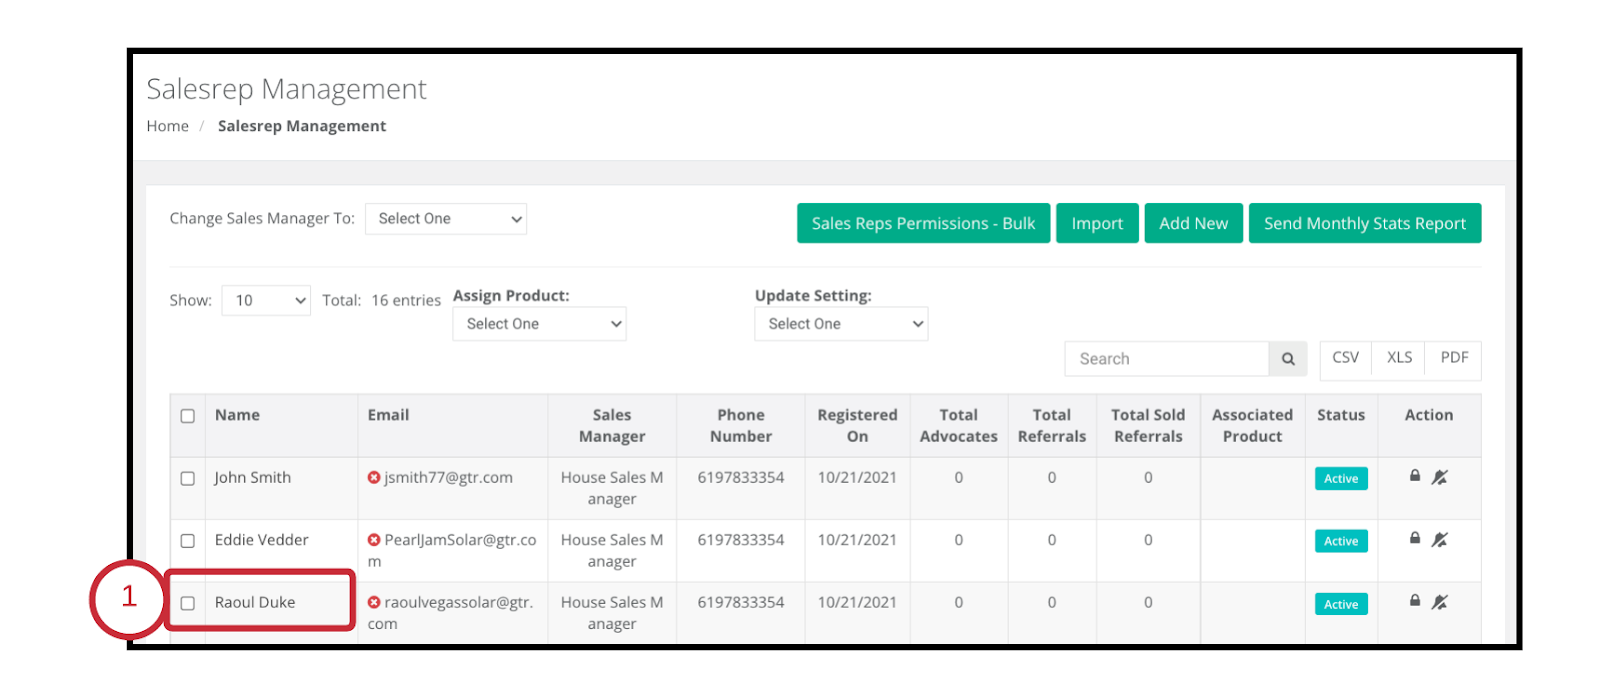
- Once on the SalesReps Detail Page, click on the Green button labeled “Make Advocate SalesRep.

- Once selected, make sure to confirm by pressing “OK”

After confirming, the SalesRep will be listed under “Advocate Sales Rep”
Products for Advocate SalesReps
Because they are Advocate SalesReps & not just an Advocate, there is a different Product for Advocate SalesRes called “Advocate SalesRep Product”
To view the Product of the Advocate SalesRep go to
Location: Settings > Product
This product is auto assigned any salesrep advocate who send a referral through the application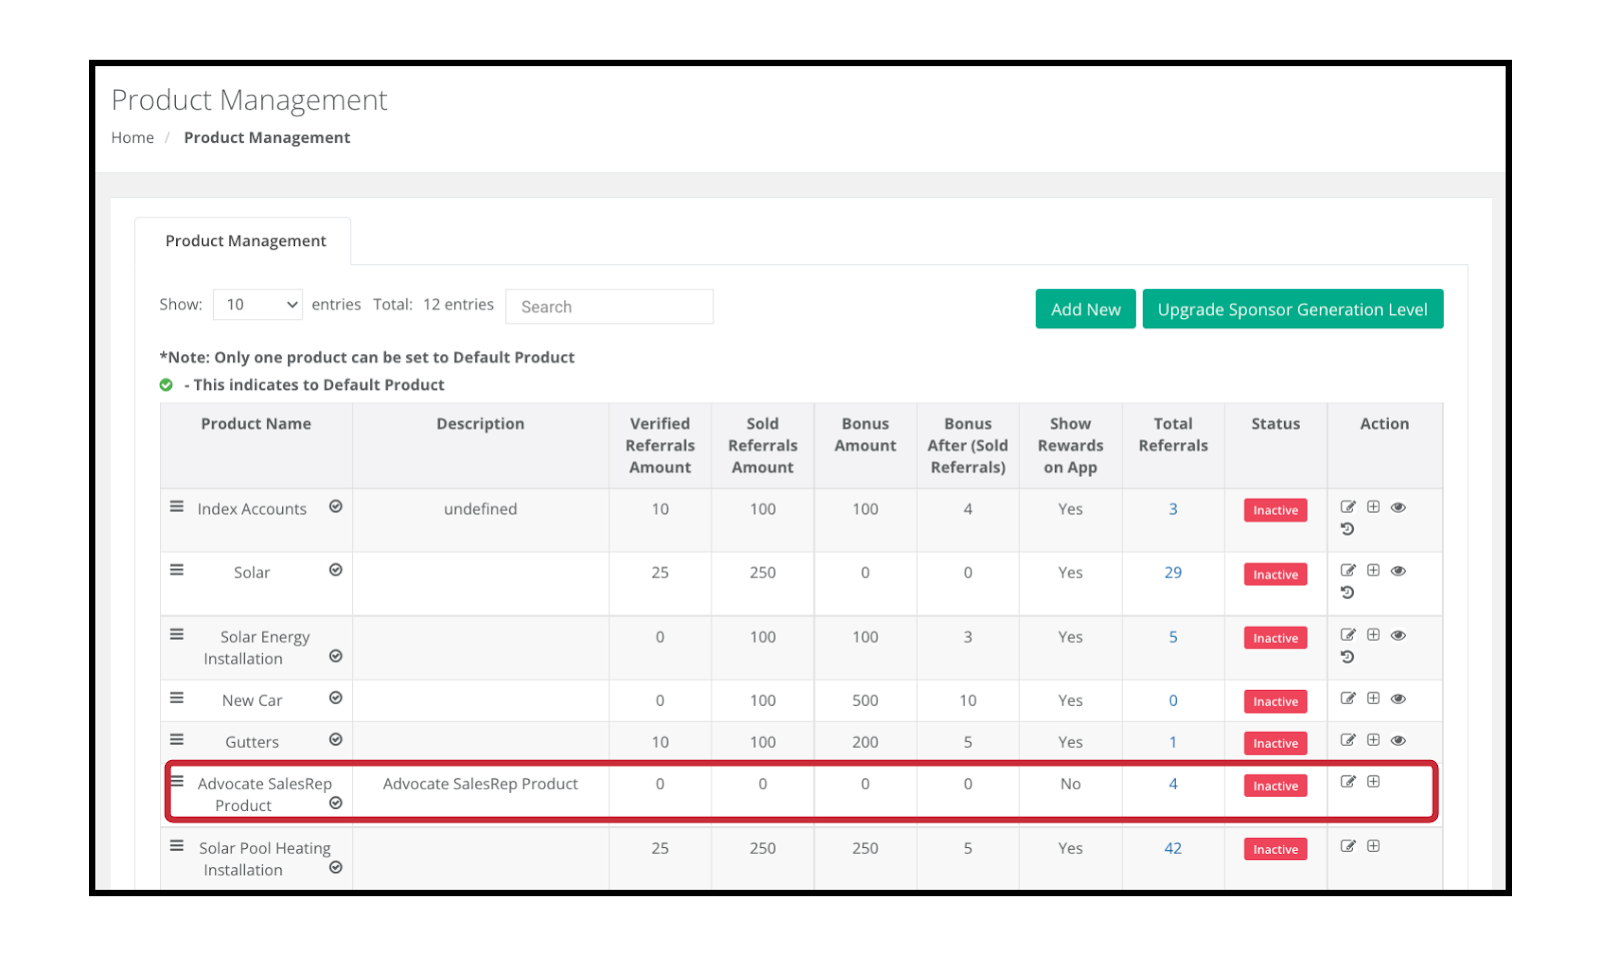
If the Company Admin wants to modify the Payout of their SalesRep Advocate, just click on the pencil icon under “Action”
Your customers will not be able to see or select this product, including advocate SalesReps