In order to add a new Sales Rep Individually, click on the “Add New” button
A form will pop up with necessary fields to add your own Sales Rep
*Remember, you can send out an registration forms for a Sales Rep instead of the company admin manually inputting Sales Reps*

If “Add SalesRep As Advocate” is checked, the Sales Rep will have access to the application similar to a customer Advocate

In order to add Sales Reps in bulk, there is a button next to “Add New” called “Import”
This is different than the other processes’ for adding Sales Reps, while it is fast and efficient; spreadsheet experience is helpful
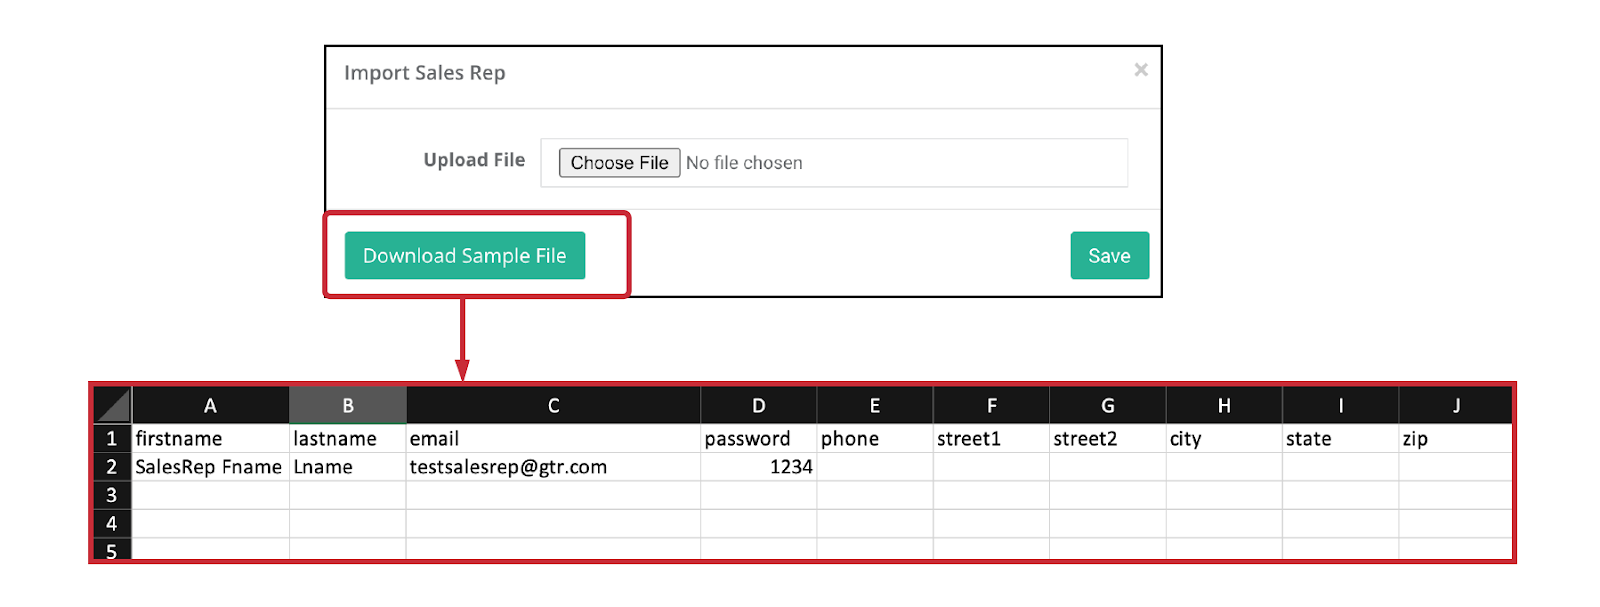
The Header Rows are the field categories, and must be followed in that order.
“firstname”, “lastname”, “email”,”password” are the required fields to be entered, the rest of the fields are optional.
*Below is an example of a filled out fields*

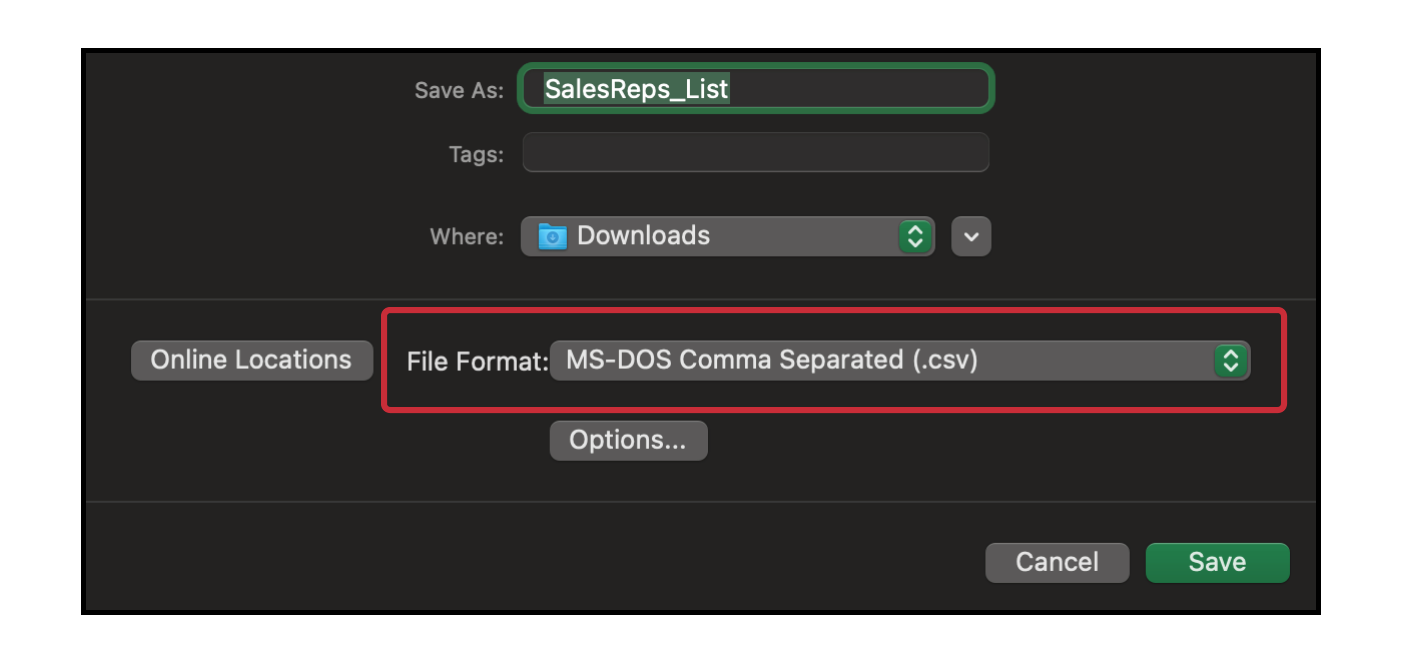
*Note, if edited in excel, the file must be formatted as a CSV File to upload *
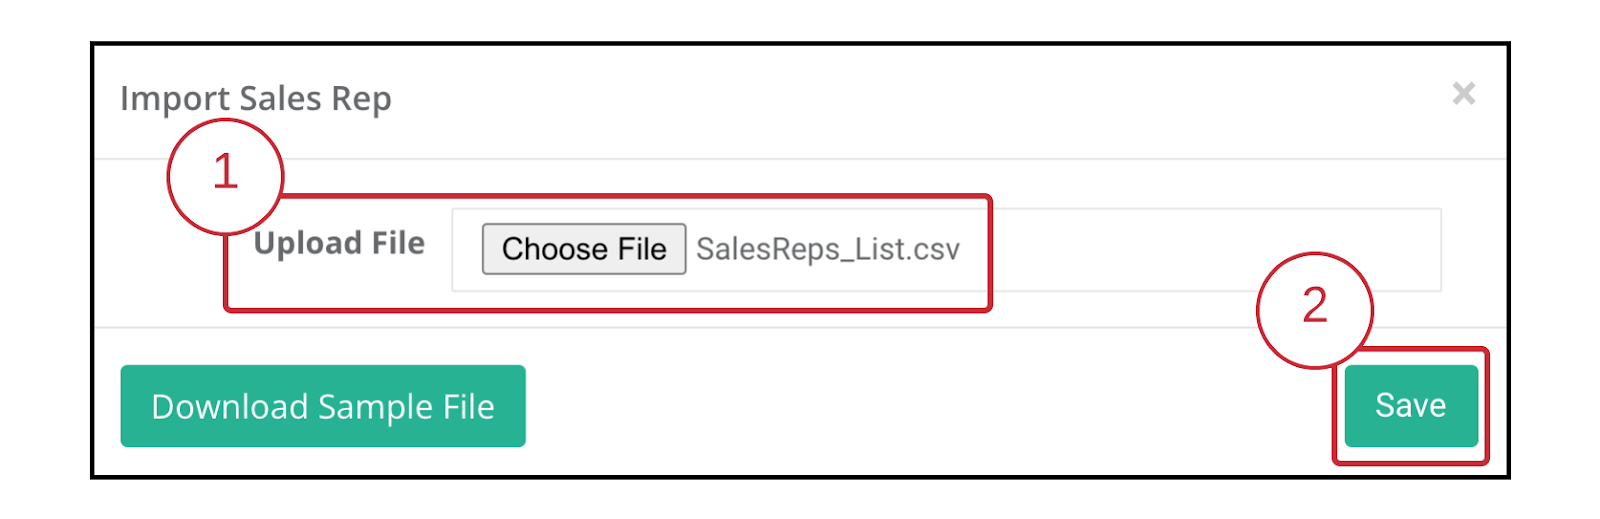
- Proceed to Upload the CSV File
- Save to import the SalesRep List
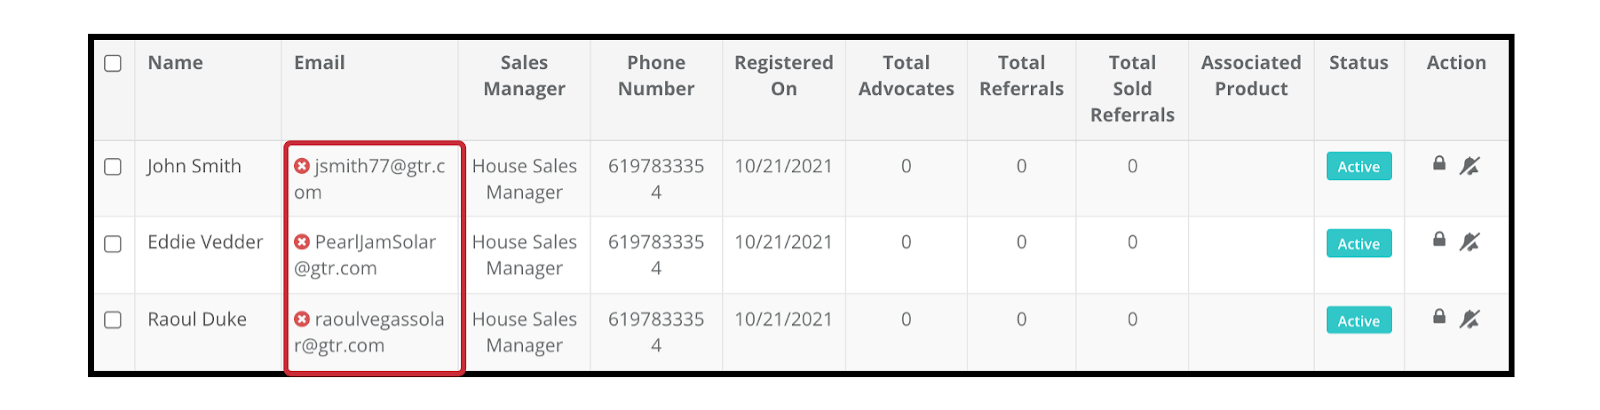
Congratulations! Your Sales Rep list is automatically imported into the Sales Rep list
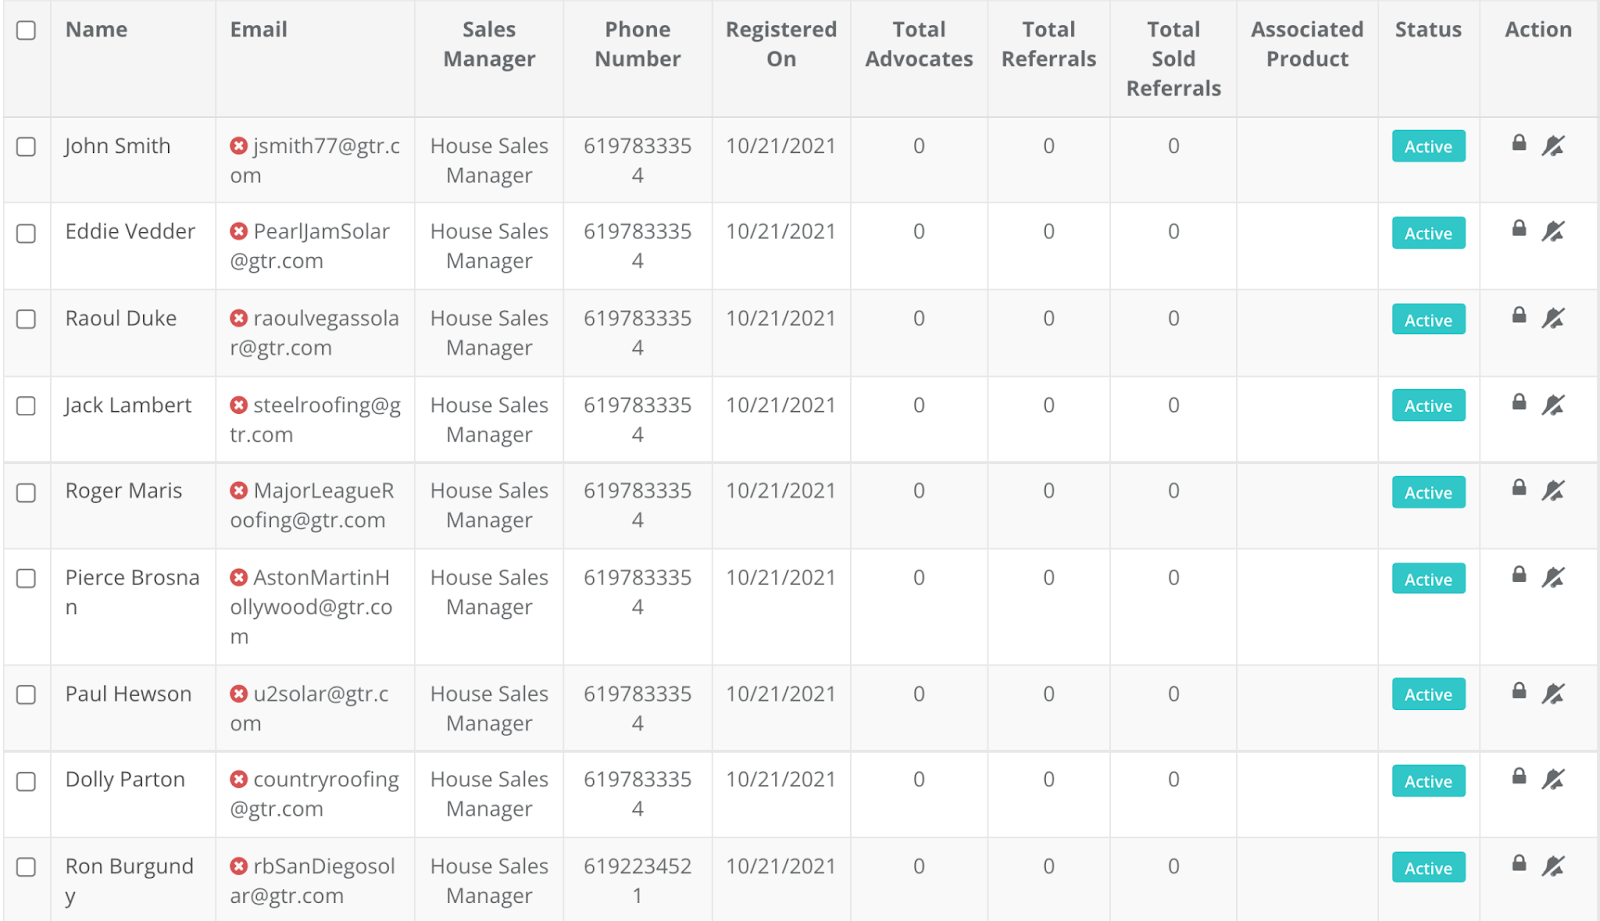
Until the Sales Rep accepts the invitation and sets up an official password, the red check marks will appear even if the account is “Active”