Location: Advocates > Documents
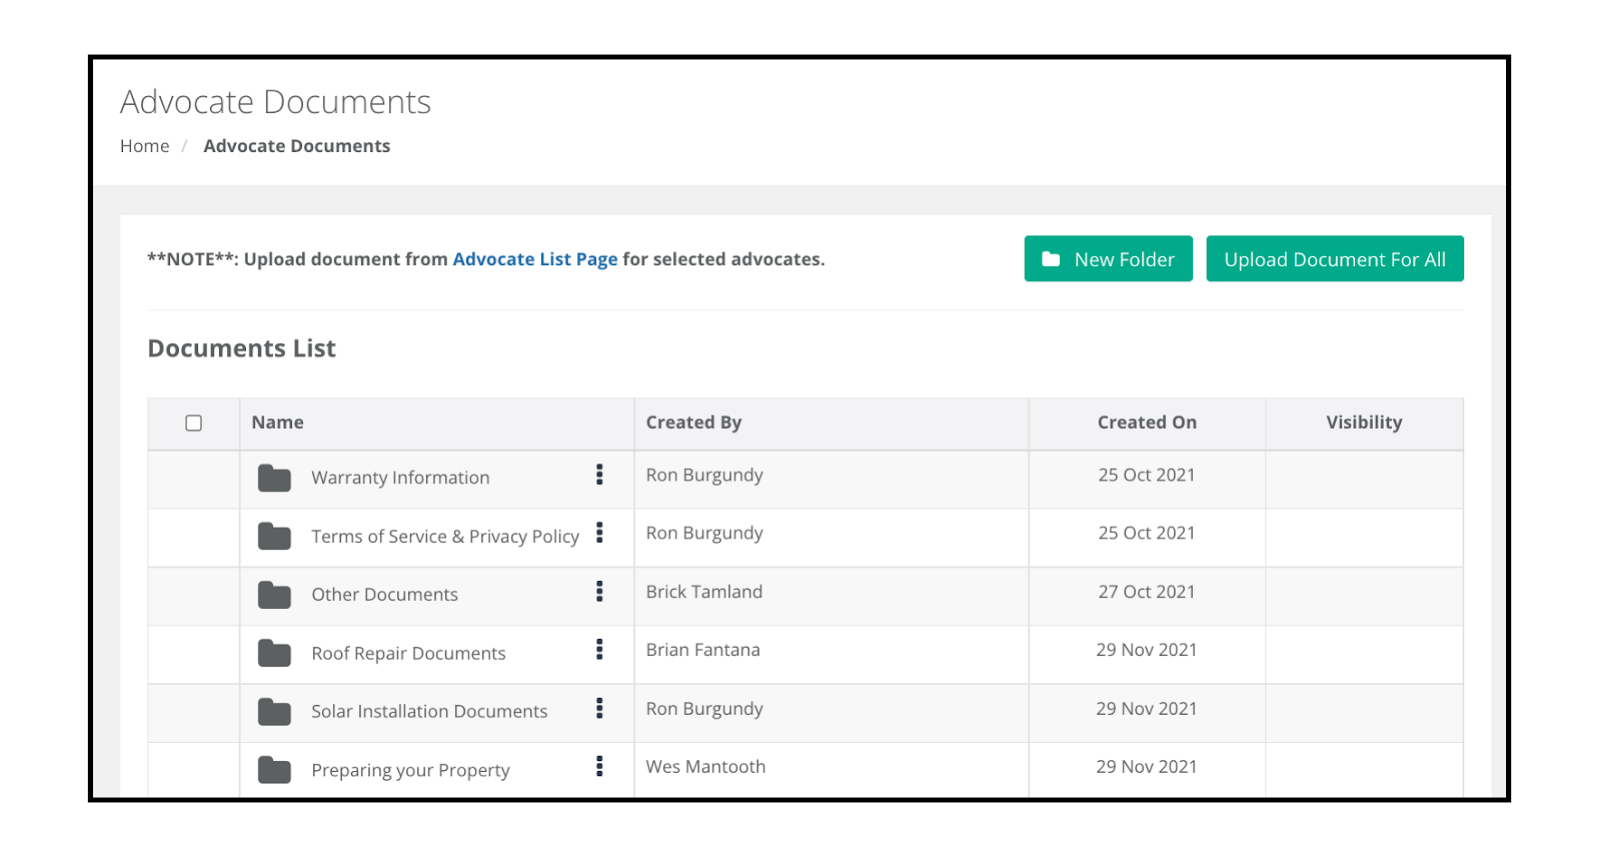
Upload Document For All Feature
Upload Document For All Feature enables Admin to upload documents that are viewable to all Advocates
This can be accessed on the main Document page, or when in a specific folder if you want the document to be in a specific folder location

Once selected, the options available for uploading documents can either be
- Uploading the Document
- Having a link to a WebPage
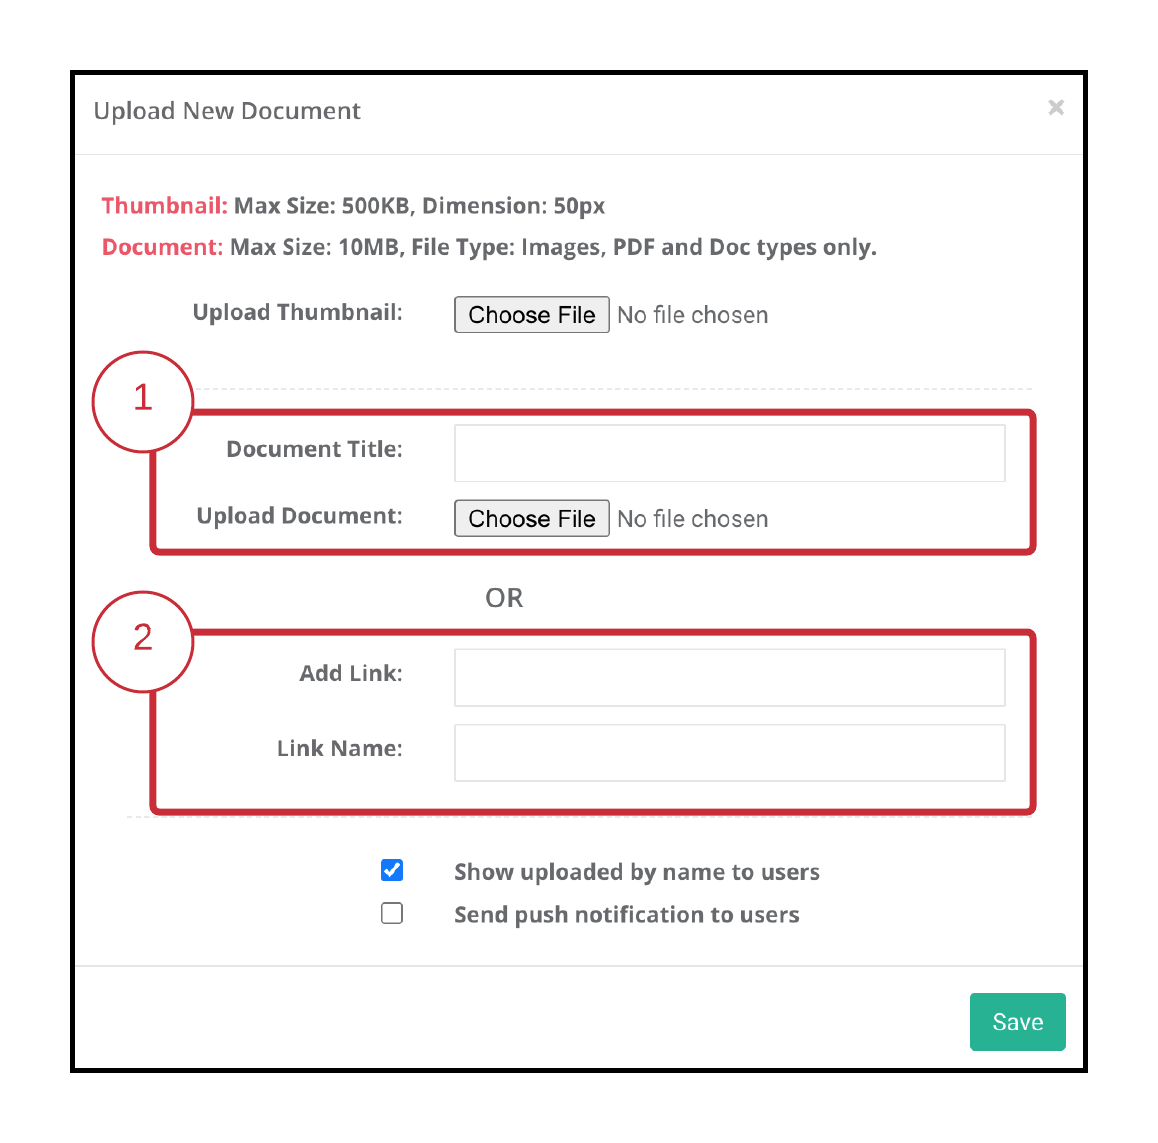
Additional Features include
- Adding a Thumbnail image
- Max Size: 500 KB
- Dimension: 50 x 50 px
- Show Uploaded by name to users
- Whoever is using the account will have their named displayed under the “created by” header row
- Sending a push notification to users
- If Upload Document for All is used, this will send a push notification to ALL users
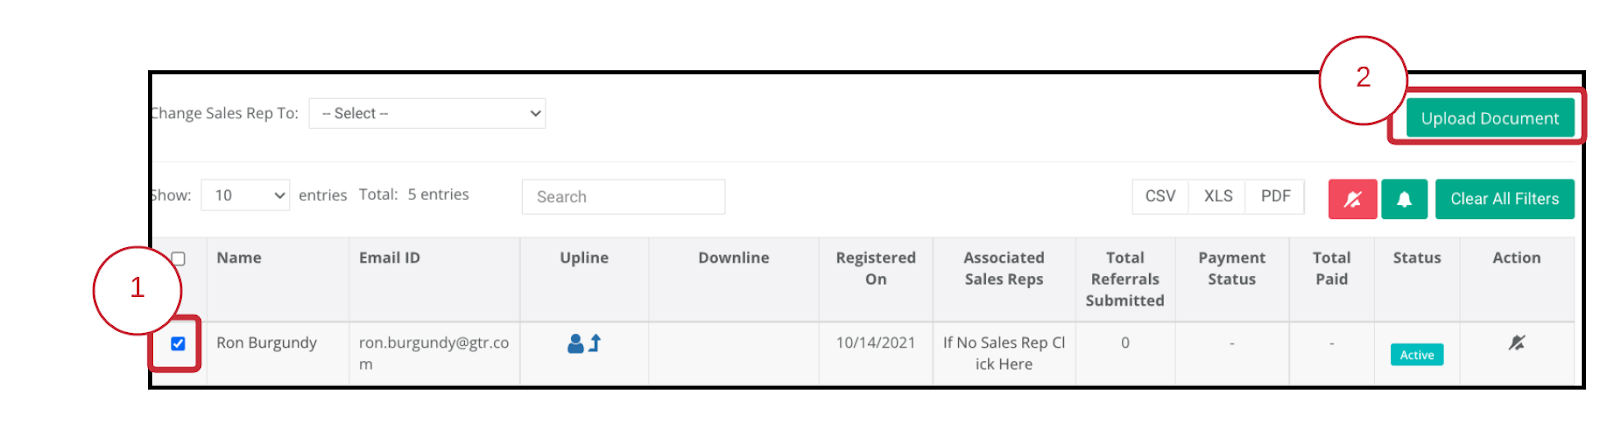
Uploading for an Individual Advocate
While GTR has already had an option for Uploading for an Individual Advocate, you can now select the folder to place it in.
If you want to upload for an individual Advocate, head to the Advocate List Page. This can be accessed by
- clicking on the Note hyperlink listed next to “New Folder” on the Documents page

- or by heading to Advocates > Active on the left drop down menu
Once on the Advocate List Page
- Click on the checkbox for Advocates you want to upload the document for
- Click on the Upload Document
After selecting the Upload Document, you can now specify which folder you would like the documents to be uploaded to.
- This includes being able to upload to a nested folder as seen in the example below
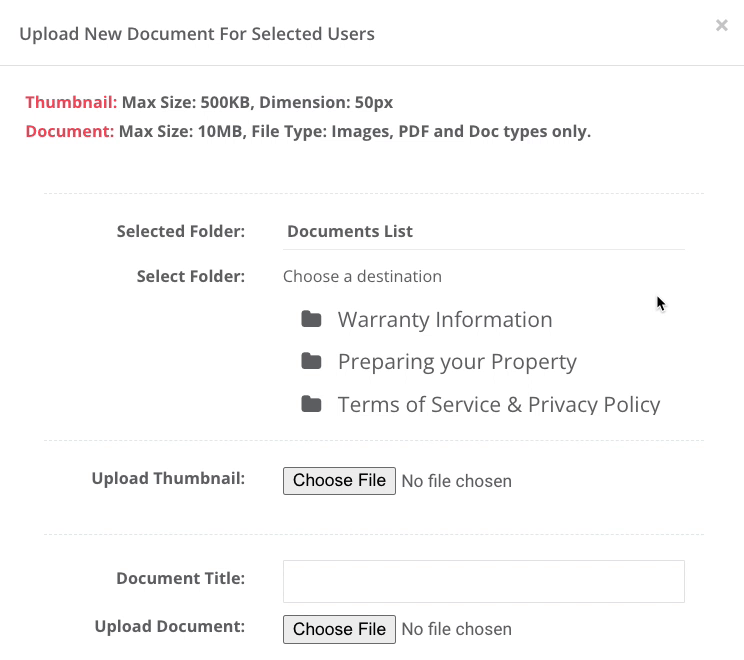
If you want to have the document not put in the folder, just skip the select folder section and head to choosing the Document or WebPage
Nested Folders
Not only can you create a folder, but you can create a folder inside a folder; which is called a Nested Folder.
In order to create a folder(s) inside an existing folder
- Click on the main folder you choose to be nested
- Click on “New Folder”
- Type in Desired Name for the folder

*Example below*

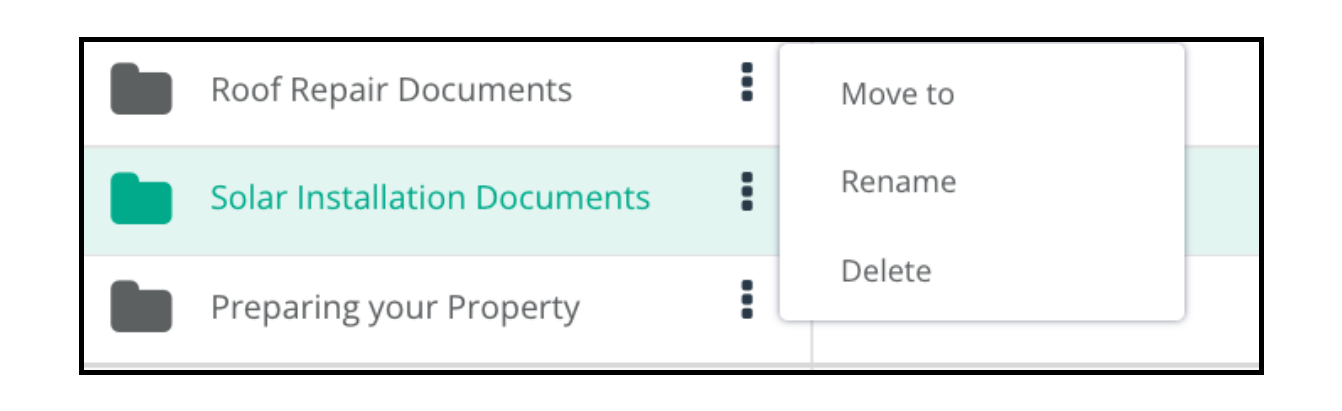
Modifying Folders
- Move to: "Move to" is a management feature that allows Admins to move the documents to another folder.
- Rename: Folders can be renamed
- Delete: You can delete a folder, but it will delete all content inside the folder.
- If you want to keep the documents but remove the folder, select “move to” on the selected documents contained in the folder before deleting the folder
Moving Documents to Folders
1. Checkbox OptionYou can move documents to a new location by checking the box next to the desired document, then pressing “Move to” green box

2. Drop Down Tab

Visibility of Folders
In order for a folder to be visible
- The folder must have a document/ file to be visible to Advocates.
- If a folder has been created, and another folder is nested inside the original folder
- the admin will still have to upload a document / file to be visible
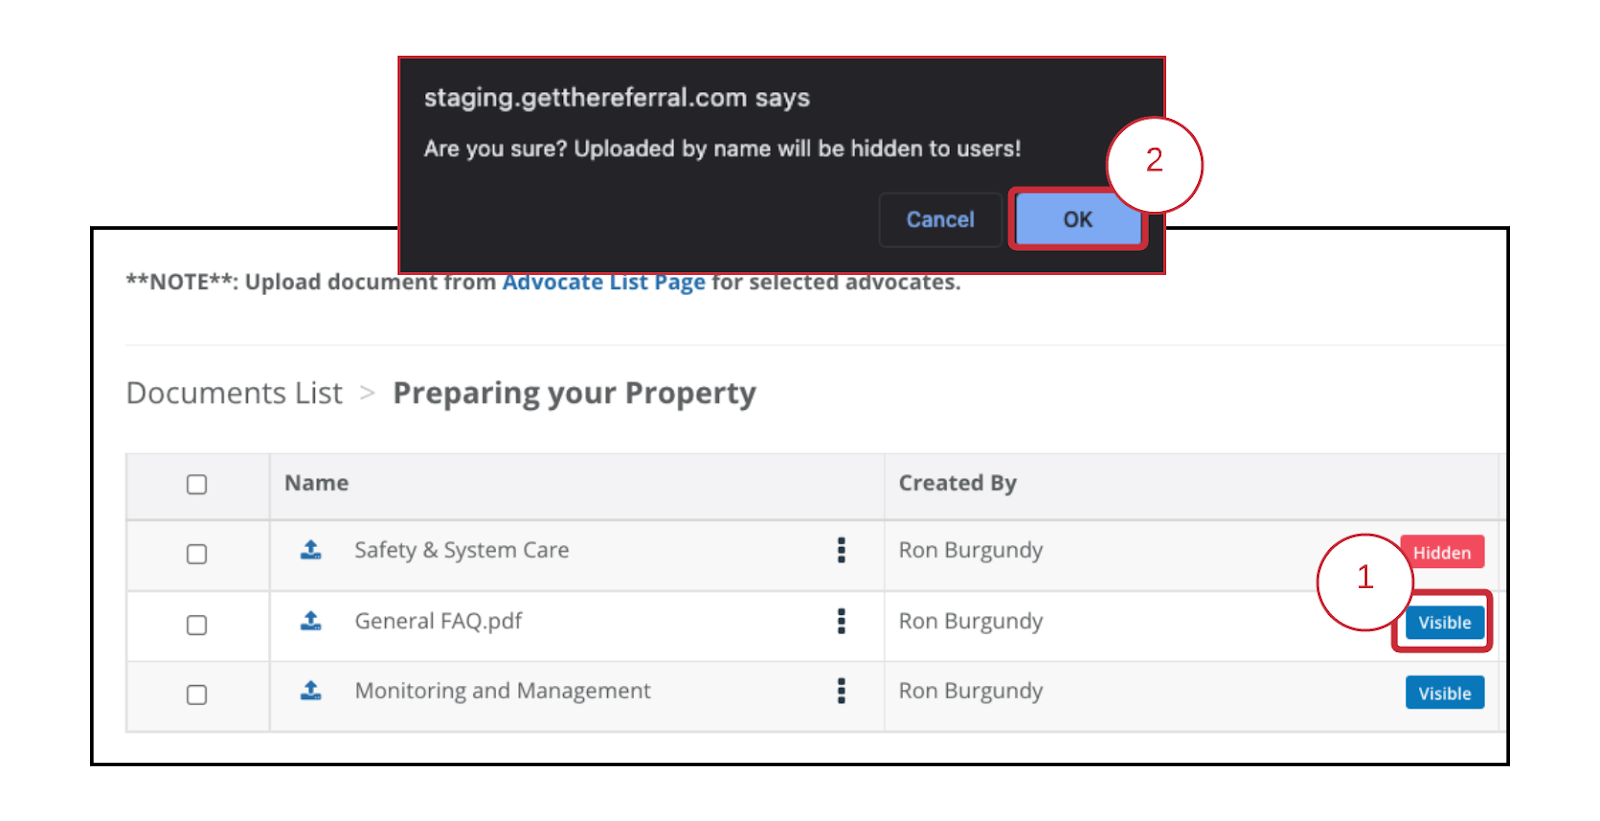
Hiding the Document
If there is a situation where a file is uploaded by the company doesn’t want Advocates to view it at the moment, there is an option to hide documents
To change from “Visible” to “Hidden”
- Click the blue “Visible” button
- Press OK to confirm change
Now the General FAQ.pdf is hidden from users as seen below
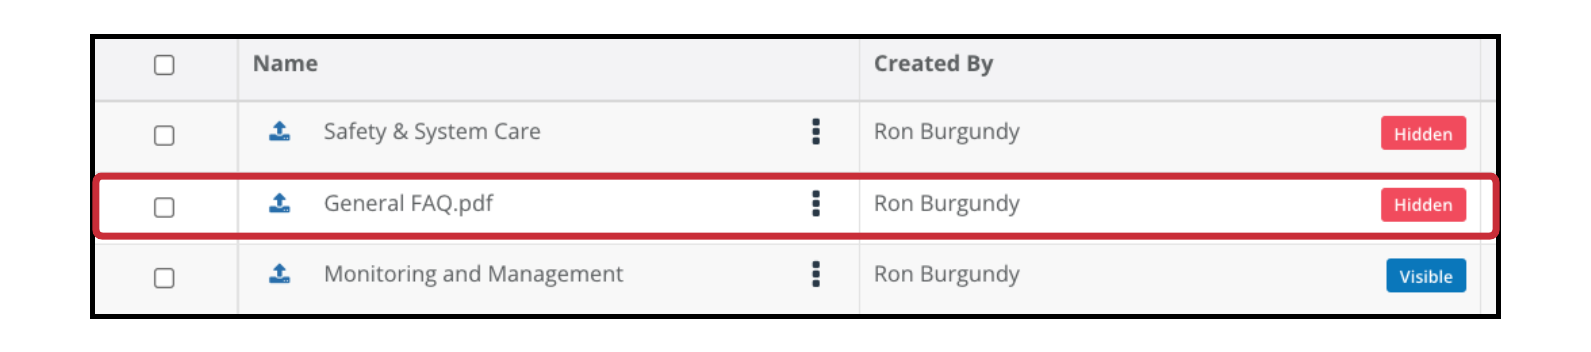
If you want to change the document back to visible in the future, simply do the same process and the document will become visible again.